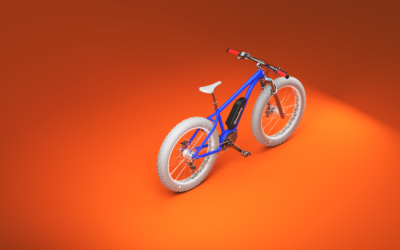
We all know that eye-catching images are key to driving online sales. What if they could be interactive as well? Read on to learn how KeyShotXR can help you create interactive 360° point-of-sale visuals for your ecommerce store or website.
Create a Touch-enabled 360° KeyShotXR
The KeyShotWeb module allows you to not only produce Product Configurators and share your scenes on KeyShot Cloud, but unlocks the ability to create touch-enabled, 360-degree viewing experiences with KeyShotXR.
Creating a KeyShotXR is relatively straightforward, but there are a few considerations when prepping your files for your ecommerce platform.
Prepping Your KeyShot Scene for KeyShotXR
Before you create a KeyShotXR, make sure to do the following:
Set the scenes background to pure white.
Product visuals tend to work better with a transparent background. This is the most common background color for websites and will provide more flexibility when adding the visuals to your product page. Start by opening the Environment tab in the Project window and open the Ground section to make sure the Ground Shadows checkbox is unchecked. Then, make sure the background Color is set to white under the Background section. (You can also set this in the Project, Image tab with the Photographic option, going to Layers and changing the Background Color to white.
Check the ecommerce platform’s image size and resolution requirements.
It’s always best to go by the ecommerce platform’s image requirements, but one option that will provide the widest array of uses for your visuals is a 1:1 aspect ratio with a minimum width/height of 1500 pixels and a maximum of 2500 pixels. Now, let’s create a KeyShotXR.
1. Select the KeyShotXR Type
Select KeyShotXR on the Toolbar, hit the X-key, or select Window, KeyShotXR to open the KeyShotXR Wizard.
When the KeyShotXR Wizard opens, it will prompt you to select KeyShotXR type. For most ecommerce applications, selecting a simple turntable is a good option. This option will produce a KeyShotXR with a smaller file size, reducing the bandwidth used on your website. Check with your website administrator or site host to discuss hosting your KeyShotXR.
2. Select the KeyShotXR Rotation Center
Once you’ve selected the KeyShotXR type, hit the Next button to select the rotation point. For your KeyShotXR to spin around its center point, the model itself should be modeled with the pivot at absolute zero.
If your object’s pivot point is not set at zero, you have two options. Go back into your modeling software and add a piece of geometry at absolute zero or add a sphere/cylinder (Edit, Add Geometry…) at absolute zero (Position, 0, 0, 0) then select that geometry through the Custom option.
If your model’s pivot point is correct, you can select Object and move on to set the Initial KeyShotXR View settings.
3. Select KeyShotXR Initial View
These settings will reflect the current settings of the Camera tab, so if you already have your Camera view, you only need to adjust the Inclination (Elevation).
Your product or preference will dictate the view orientation but, generally, an elevation somewhere between 10-30 degrees works well. Again, check your ecommerce platform’s requirements image specifications.
You can then fine tune the rest of your camera’s settings if necessary or hit the Next button to continue.
4. Select Smoothness Control and Render Settings
Smoothness Control is the smoothness of the (mouse or touch) rotation with more frames providing a smoother experience but potentially longer load times. You can try the default setting or test a higher number (like 24, 48 or 72) to achieve the desired smoothness. On the next page you can change your output settings and hit Render Now or click Render Options to adjust the render settings as you typically would. Just make sure that KeyShotXR is selected along the top of the Output window before rendering.
5. Share Your Creation
Once your KeyShotXR is rendered, go to your KeyShot Resources, Renderings folder. Here, you’ll find a sub-folder for the KeyShotXR that contains your KeyShotXR html file, a folder of rendered frames, and an instructions.html document with an embed code for your website.
From here, you can add the KeyShotXR folder to a shared company drive to share with stakeholders and other development partners, host it on your own website, or use the individual frames of the KeyShotXR for more product shots on your ecommerce website. For more information about KeyShotWeb and KeyShotXR, along with a guide on how to embed a KeyShotXR in WordPress, visit the KeyShot Manual.
KeyShotXR Example
What Can You Create?
We would love to see what you create with this tip. Visit the KeyShot Amazing Shots forum to see what others are creating and share your own work. And if you have a suggestion for another tip share it in the comments below.


0 Comments