With KeyShot, we squeezed the succulent juice of transparency out of alpha channels to bring you improved opacity maps. There’s no need to create detailed holes, repetitive patterns or complicated cutouts in the 3D model. Opacity maps allow you to use a black and white image or alpha channel transparency of your detail to make those areas of the material transparent. So, say you have a mesh material. Instead of cutting an array of holes in the model, use an opacity map to show the holes and what lies beneath. Philippe Vanagt has a wonderful example of that. So, we asked him to share the process and the amazing renderings he created using them.
Philippe Vanagt – How To Use Opacity Maps
At first I was surprised to get a request for a little step-by-step about my most recent “Amazing shot” in the KeyShot forum. It shows a wall-mounted louvre – an acoustic version.
I was surprised because, making this render and setting it up was as easy as touching your nose with your finger while being sober! But then I understood… the guys over at Luxion HQ are clever. They quickly saw that any brilliance in my render was due to their product and not my skills. That’s good thinking! PLEASE don’t tell my boss though!!! I’d rather have him thinking I’m an ace at what I do. 🙂 [KeyShot HQ Note: But even more we love our users and showing the amazing images they create!]
The company I work for has 3 divisions – Ventilation, Sunprotection and Projects. The render request this time came from Projects. They manufacture structural sun shading and louvres.
Since a wall-mounted louvre is not much more than a frame, they mostly work in 2D. Fortunately, they provided a bunch of STEP files. Upon opening these, I noticed that the louvres were completely closed and since I knew these were supposed to have acoustic functionality, I quickly grabbed the phone to ask for more detail. As I expected, they hadn’t added the perforation on the insert part. The perforation has holes of 4mm at a 6mm spacing, so adding those would dramatically increase file size and complexity – been there, done that. I once had to render a window ventilator with a wire-mesh in it. Since R&D doesn’t draw those details, I did. This resulted in a lot of frustration and crashes on Autodesk Inventor. In the end though, it rendered out well.
Since the part I was about to render next contained a couple thousand perforations, I opted to use the opacity map feature in KeyShot. Better yet, I opted to use a mesh material, readily available in the KeyShot 3.1 library. Mesh material with opacity map was available in KeyShot 2 already. However, I found it rather tricky to use before. Now the opacity map is just right, available to use with any type of material!
After importing my setup, this is what it looks like:
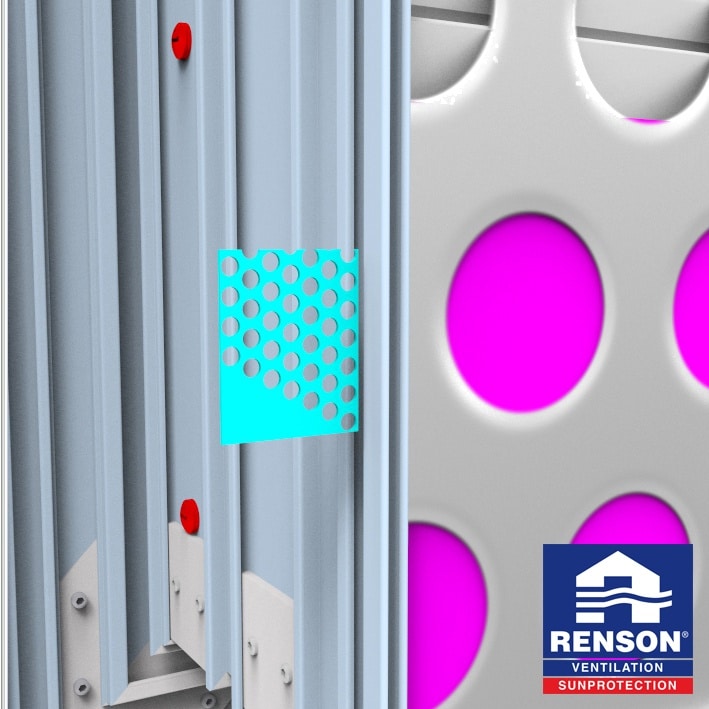
To make sure I could get the scale of the perforation right, I added a small reference piece of real perforated plate. Then, I just drop the “Aluminium circular mesh” material onto the turquoise parts. It’s found under Metal > Aluminium > Mesh.
You see… it’s a good thing I took the reference part! Selecting the material and going to the Textures tab, I select the Bump map and enable Sync. This way, any change I make to the bump map, will auto-synchronize with the opacity map. Now I changed the scale to 0.085.
As you can see, there is a difference between the two. However, which one do you prefer visually?
How about now? After adding the black fiber fabric material to the part behind it and zooming out, you can hardly tell the difference.
Now for the rest of the louvre, I chose chrome for the screws and a copy of the mesh material for all other visible parts. I did remove the bump map and the opacity map from the copy though, just to make sure both aluminium materials look the same.
Now for the detail shot settings. After zooming in and moving the frame part out of the way, we get to see the inside of the louvres.
In doing so, I noticed that the perforations of the louvres are almost oval-shaped. This is simply because the material uses a box map. I initially set everything up to be the same as the bottom insert, which is vertical. The other inserts are at an angle, so the projection of the perforation is wrong. This is simply solved. Just unlink the material from the vertical insert and edit the material to reorient the map.
And there you go. Thousands of holes in a jiffy. And for the most part, this is just the default textures available in the KeyShot library. Simply reduce the ground plane size and up the shadow quality to 2 and you’re all set. Again… please don’t tell my boss!
Philippe was also kind enough to include the Rockwool material that he used for the insulation in the louvres. You can Download the Rockwool .ksp here.


0 Comments