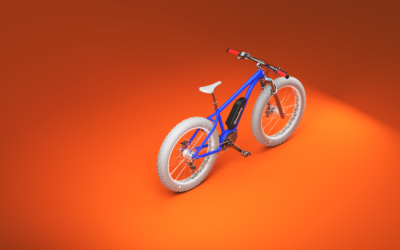
When you create a KeyShotXR, KeyShot generates a set of static web pages. If you open the html file created, it loads in a browser. However, to share the KeyShotVR with someone else, you need to host it somewhere they can access it. If you don’t have access to a personal/company web server, there are other methods of hosting your KeyShotXR.
Dropbox and Google Drive use to be great options for hosting static web pages, but they have recently ended support for rendering html. So, what other options are there? Today, we’ll look at hosting a KeyShotVR on GitHub.
What is GitHub?
GitHub is a web-based file repository with some cool features like distributed version control, in-line editing, wikis and, the one we’re looking for, web page hosting. Through GitHub Pages, you can create a site for yourself or your company, or create unlimited project sites. And, in many ways, it’s easier to use than other web hosting solutions or uploading all the files through FTP. Best of all, it’s free for publicly hosted files and cheap ($7/mth) for unlimited privately hosted files. So, how do you host a KeyShotXR on GitHub? Let’s walk through the steps.
How To Host a KeyShotXR on GitHub
We’ll go through the steps of hosting a KeyShotXR for you or your company’s GitHub account. We’ll go through the process but reference the GitHub Pages overview if you have more questions. Before we get started, you’ll need to do two things. If you’ve already done this, you can skip to the next section. First, you need to:
Next, you’ll create a repository (folder) and upload your KeyShotXR. After you have done this the first time, it will be as simple as adding your new KeyShotXR and syncing (steps 3 and 4).
- Create a repository – Go to GitHub and create a new repository named username.github.io, where username is your username (or organization name) on GitHub. (Note: it needs to match your username and be set to public). After entering a name, select “Create Repository”.
- Clone the repository – On the next screen, click “Set up in Desktop” button. You should be prompted to open GitHub Desktop. When it opens, enter the local path you prefer and select “Clone”. If GitHub Desktop doesn’t open, start it up and select “Clone a repository from the Internet…” and, in the popup window, select the repository you just created.
- Add an index.html file – Go to the folder and add an index.html file. Download one here (right-click, Save Link As…) or open a text editor, enter the text below and save as index.html. (Make sure it doesn’t have .txt. at the end.)
<!DOCTYPE html>
<html>
<body>
<h1>Hello World</h1>
<p>I'm hosted with GitHub Pages.</p>
</body>
</html> - Add your KeyShotXR – Copy or move your entire KeyShotXR folder to the local path you chose to clone the repository
- Commit and sync the files – In GitHub Desktop, you’ll see the file(s) appear. Below the list of files, you’ll see a text area. Enter a short summary and select “Commit to master”. Then, in the upper right corner, select “Sync”.
Viewing your KeyShotXR
Now, when you open browser and go to https://github.com/username/username.github.io, you’ll see the list of files/folders you uploaded. You can view your KeyShotXR, by going to https://username.github.io/KeyShotXR/KeyShotXR.html (replace the username and KeyShotXR with the names you used.)
How to Embed a Responsive KeyShotXR
The instructions.html produced when rendering a KeyShotXR includes directions on how to embed a KeyShotXR that’s responsive (fits the width of a browser or div), but we’ll include how to do it here as well. To embed a KeyShotXR, copy the following code to your website page and replace the red highlighted text (the source url) with the url of your own KeyShotXR. When creating the XR from KeyShot, the highlighted blue text will be automatically generated by KeyShot, but you can adjust this to match the aspect ratio of your own KeyShotXR, i.e. 100% for 1:1, 75% for 4:3, 56.25% for 16:9, and so on.
<iframe src=”https://joshmings.github.io/ksxr/skeltool/skeltool.html” frameborder=”0″ allowfullscreen=”true” webkitallowfullscreen=”true” mozallowfullscreen=”true” style=”top: 0px; left: 0px; width: 100%; height: 100%; position: absolute;”></iframe>
</div>
Here’s the example KeyShotXR using the code above. Go ahead, give it a spin, and if you have some of your own, share them here or on the KeyShot forum.


0 Comments