Curious about rendering fabric? How about rendering fabric stretched over a speaker grill? Go no further. Esben Oxholm is back with another tip, showing you how to use the Material Graph in KeyShot Pro to achieve a stretched fabric over speaker grill appearance.
Rendering Stretched Fabric
Creating a fabric appearance with a subtle indentation of the speaker grill may seem challenging but there are really just three simple steps you need once you have your fabric texture added. So how is it done?
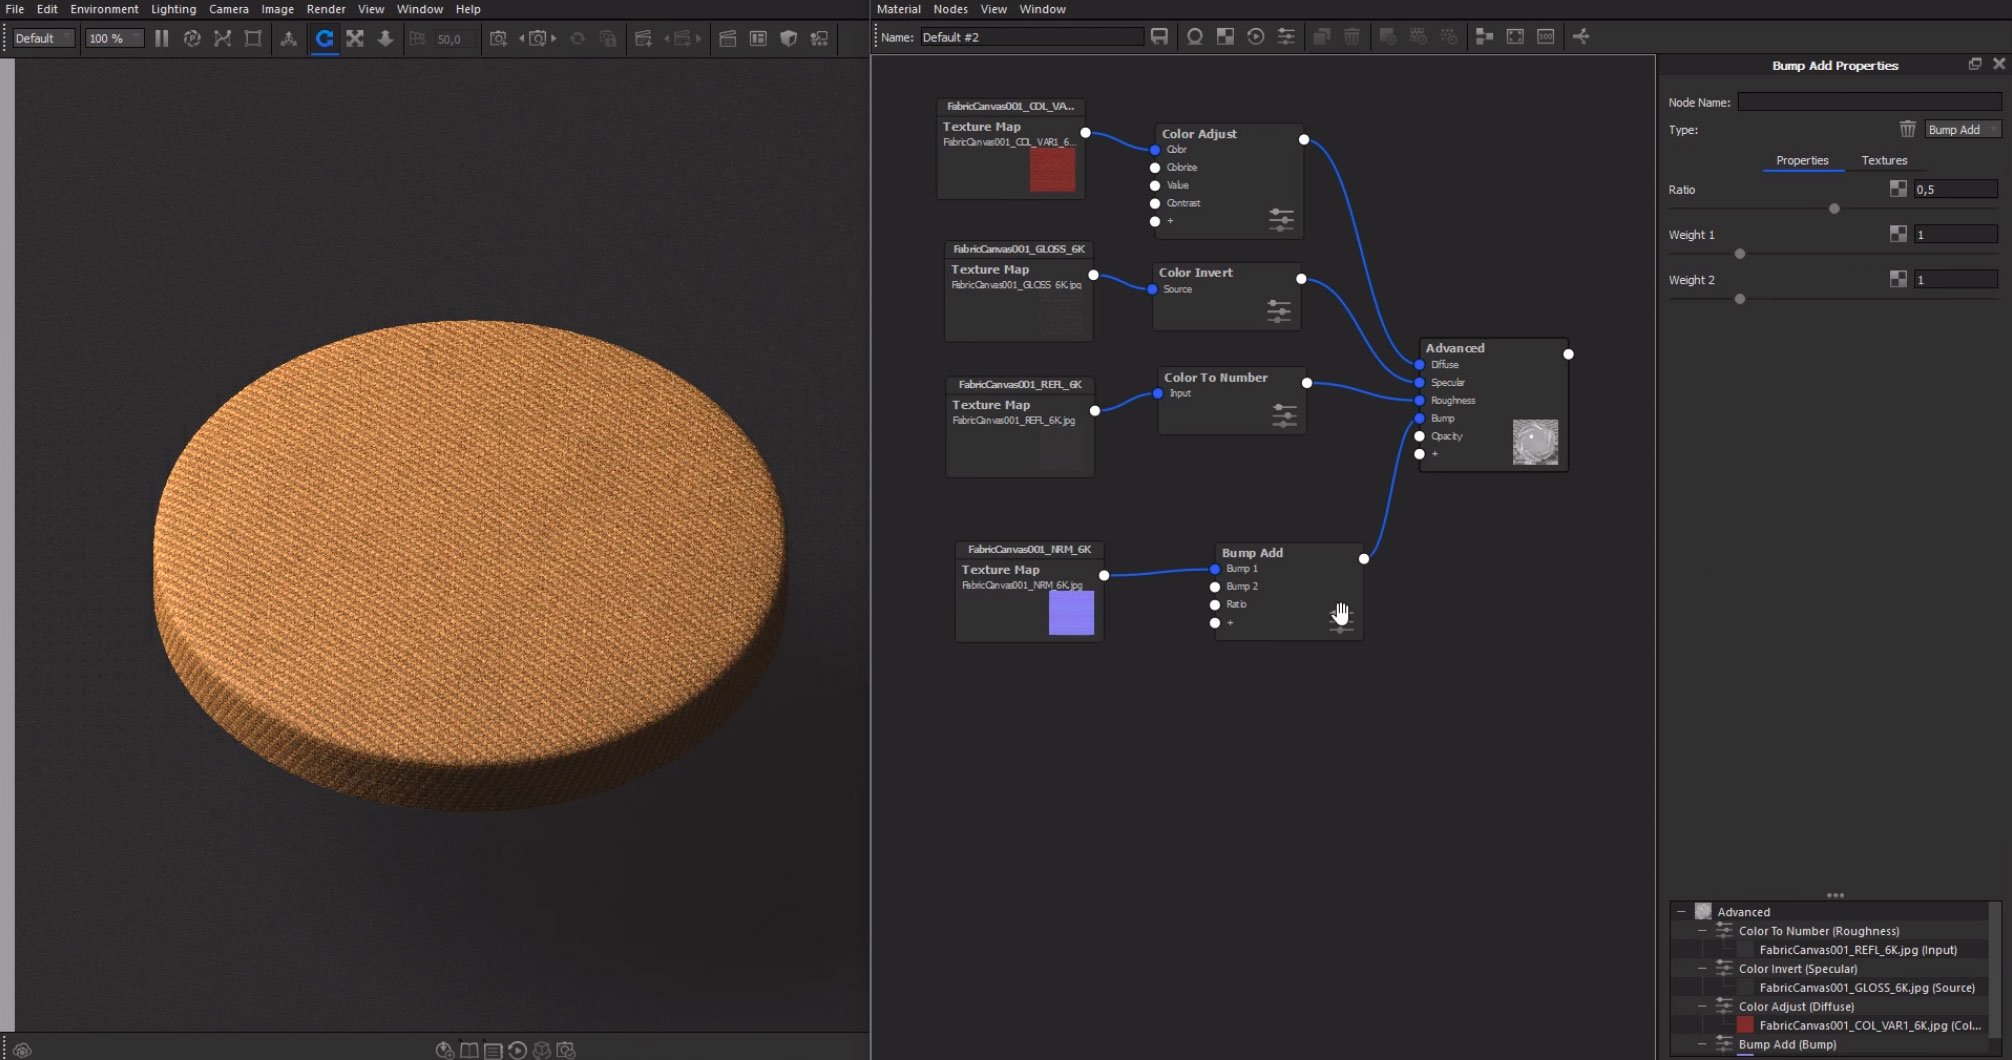
1. Apply ‘Bump Add’ Node
Right-click in the Material Graph, on the connector between the Base Material node and the Bump Map node, and select Utilities, Bump Add. This adds an additional Bump Map option to the material. There are no properties to change here.
2. Add a Mesh Texture
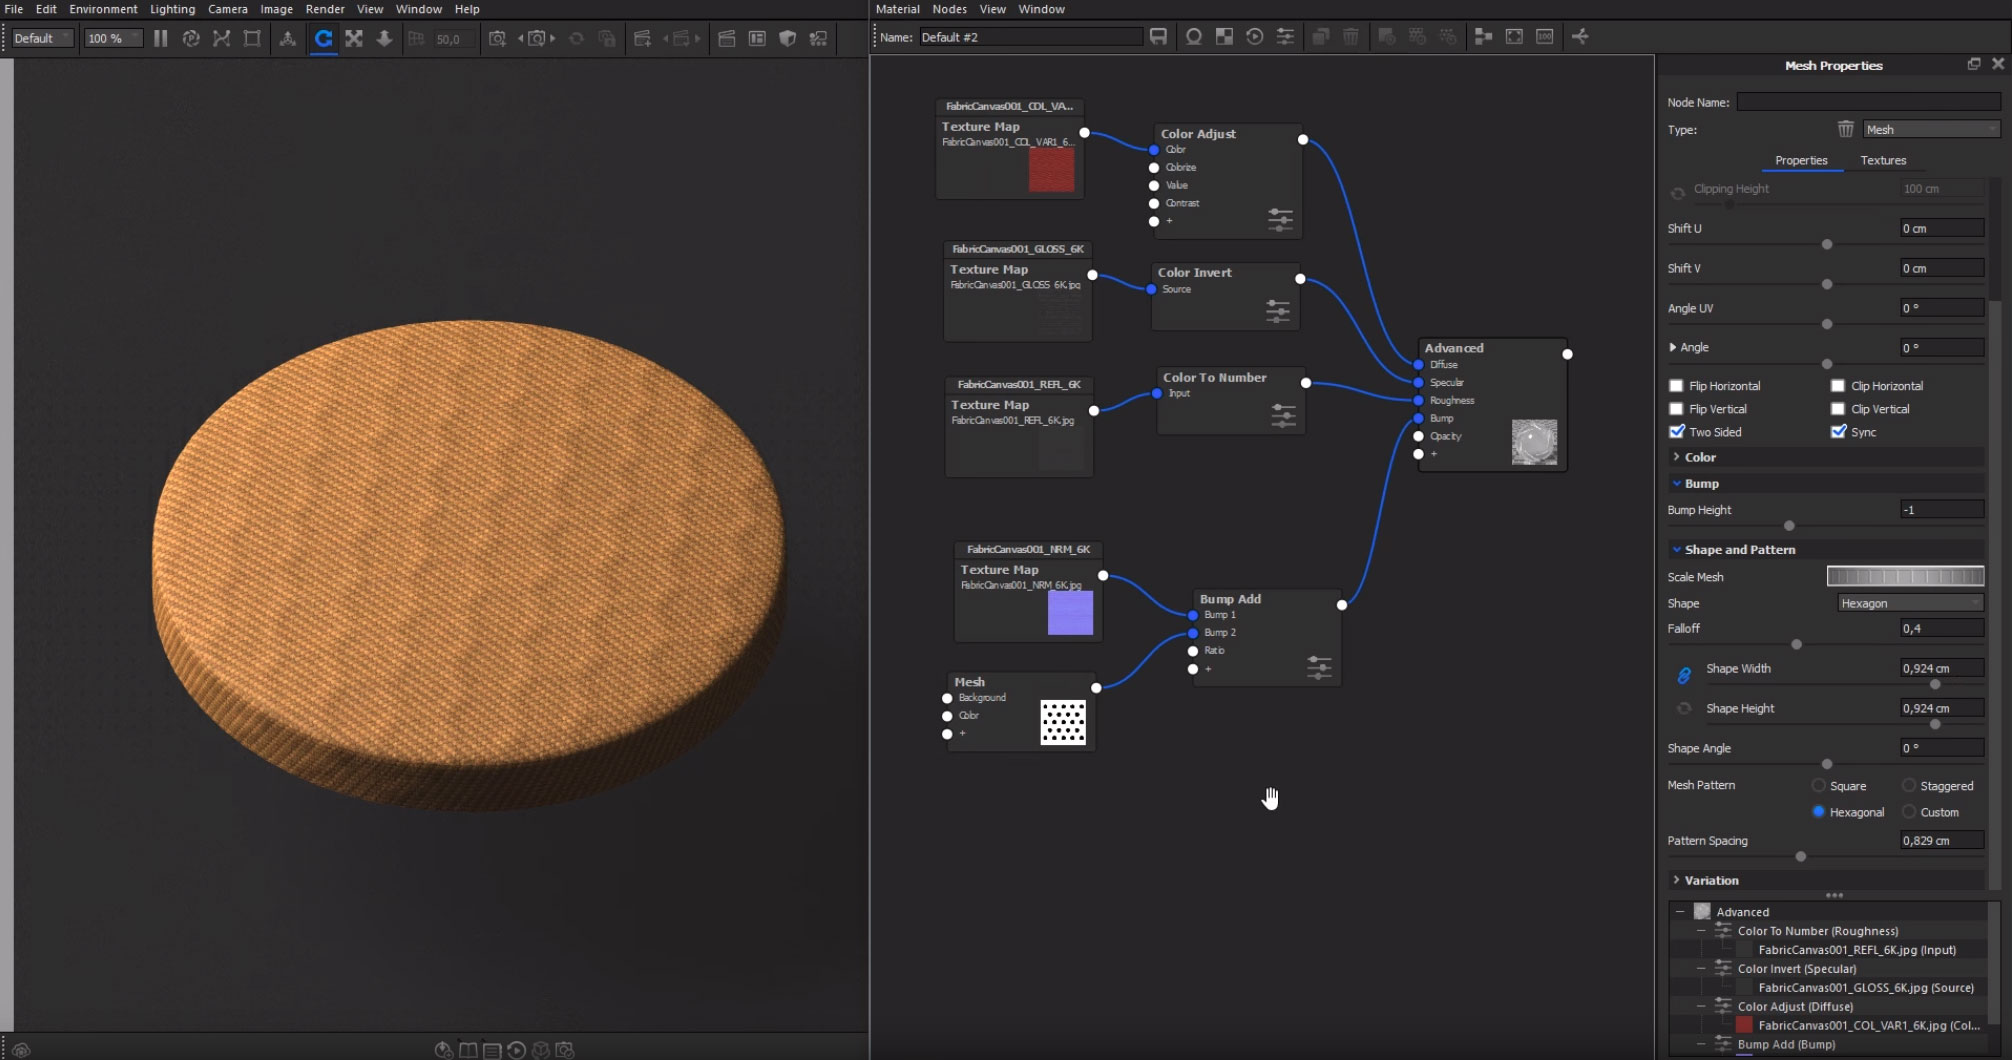
Right-click in the Material Graph area and select Textures, Mesh to add a Mesh texture node. Hit the C-key to preview the mesh texture, change the Mesh Properties, Shape option to Hexagon and Mesh Pattern to Hexagonal. Adjust Scale, Falloff and other settings to your liking. Hit the C-key again to exit the preview and add a connector, plugging the Mesh texture into Bump 2 of the Bump Add node. Change the Mesh Properties, Bump Height to be a negative value.
3. Add a Color Gradient Texture
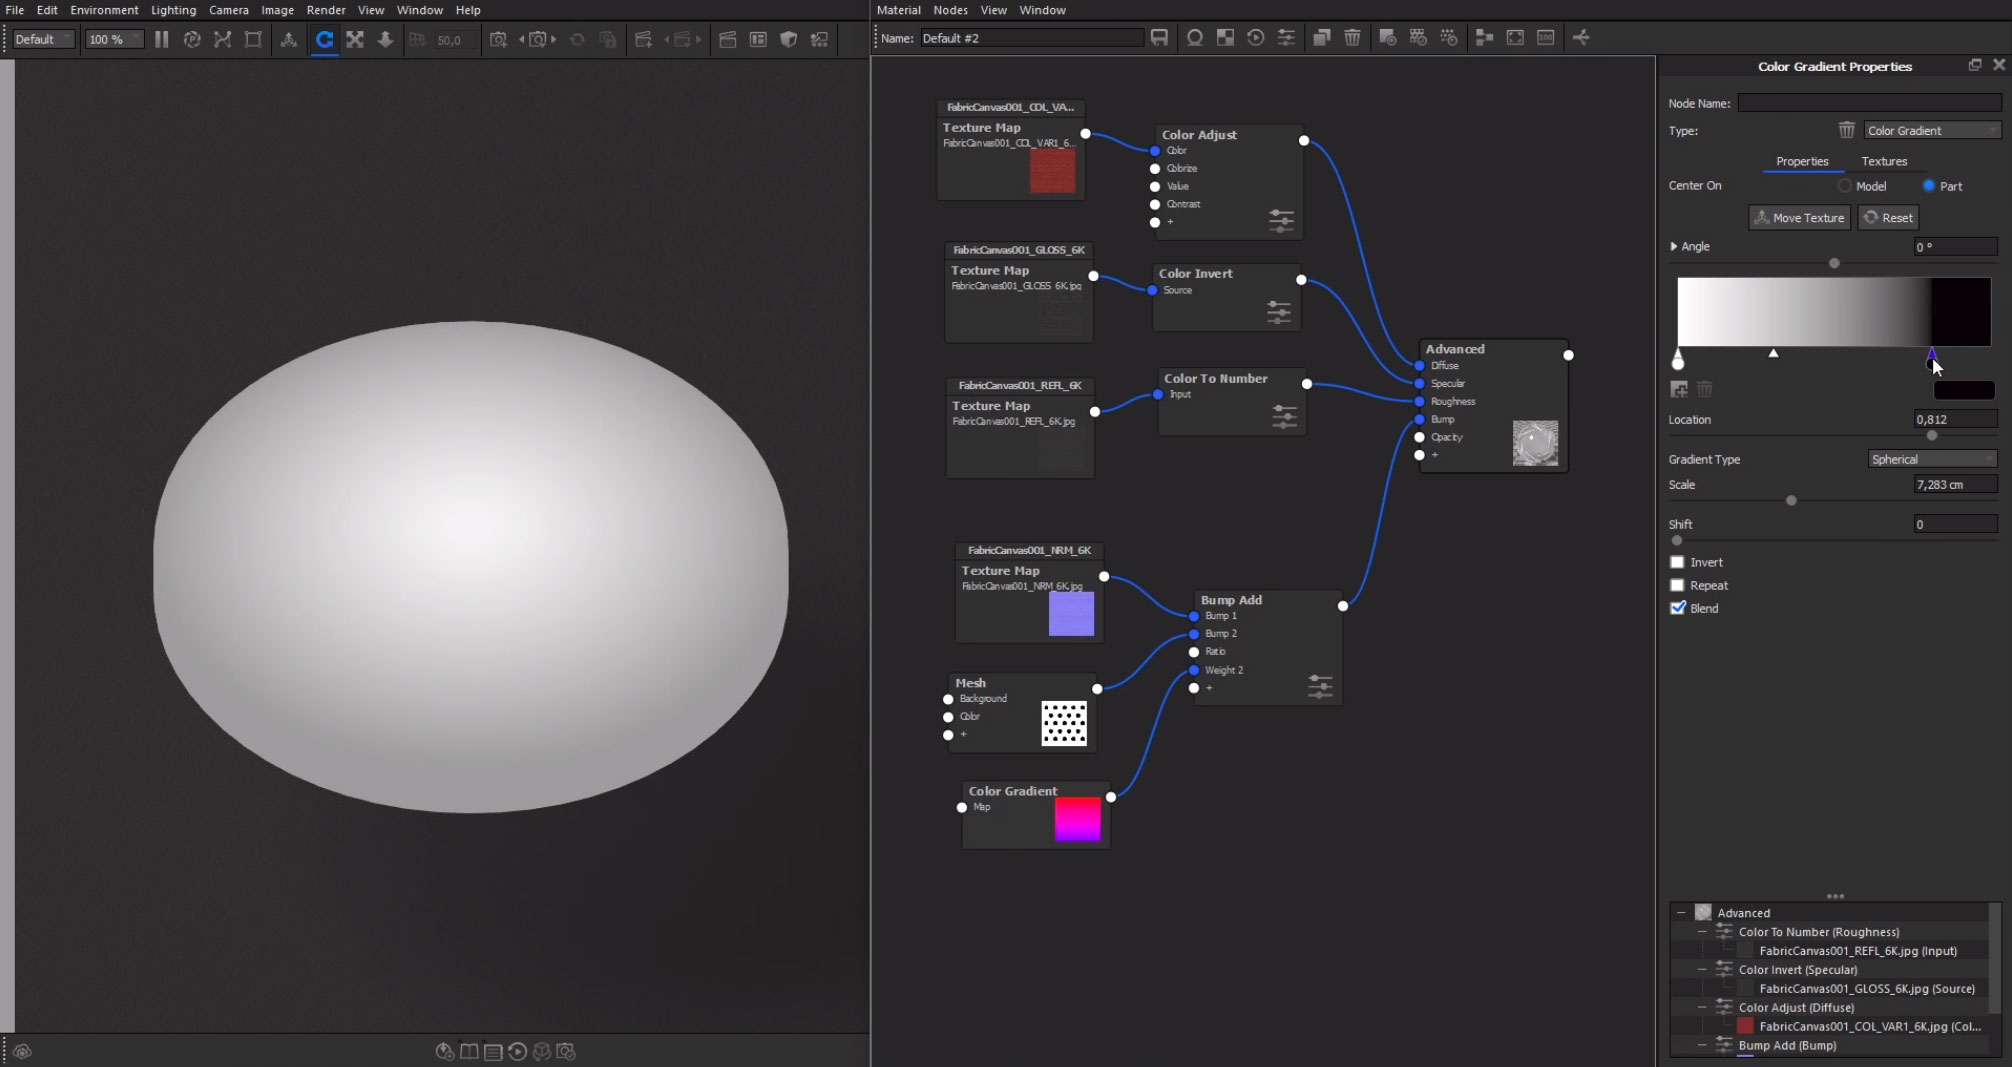
Here’s the secret for added realism. Right-click in the Material Graph area again and select Textures, Color Gradient to add a Color Gradient texture node. Add a connector, plugging the Color Gradient texture into Weight 2 of the Bump Add node. Change the Gradient Type to Spherical and the Center On option to Part. Adjust the gradient pins to bring up the black value that will reduce the bump appearance providing that subtle falloff/stretched appearance.
Here’s the video walking you through the entire process:
Want More?
Esben’s website is a treasure of tutorials and resources for learning more about KeyShot and product visualization. You can view tutorials he has produced and download KeyShot scenes at esbenoxholm.dk/diy/. While you’re at it, check out his Gumroad page as well and don’t forget to subscribe to his ‘Link Collection’ newsletter which contains additional resources.
Hands-on KeyShot Training
Interested in learning more about KeyShot? Contact us for information on our training that covers everything from KeyShot Basics to Advanced Workflow, Material Creation and more.




0 Comments