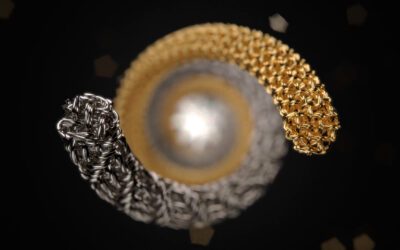
Cables show up in all kinds of products, environments and scenes. Here’s how you can use KeyShot RealCloth™ to create a braided cable effect.
Create Braided Wire, Hose, and Cable in KeyShot
KeyShot RealCloth™ has applications across all types of woven materials. A woven or braided cable is unique because of the wide variation in appearances, and also in the approach you take to create a woven material around a cylindrical surface. The same approach can be applied to a range of products like braided wire, hose, or electric conduit and cables. Let’s have a look.
Before You Begin
The first step to successfully creating a braided cable is making sure the model you’re working with is properly UV mapped. If the model does not have UVs, you will not be able to apply RealCloth™ to the model. Visit the KeyShot manual to learn more about UVs and KeyShot’s Unwrap UV tool.
Add and Customize RealCloth™
Add RealCloth™ by double-clicking on the model’s surface to open the Project panel, Material tab and selecting RealCloth from the material Type drop down. Then, under the Weave Pattern dropdown, you can select from any of the preset patterns. Let’s select a Basket 8×8 pattern to create a metal braided hose effect.
You’ll also want to make sure that the Scale Mode is set to UV and, depending on the size of your UVs, you may need to adjust Scale up or down to mimic the type of cable you want to re-create. The next thing to do is change your weave pattern’s angle by scrolling down to the RealCloth material’s Advanced settings, then changing the Geometry, Angle to match the appearance of the braided cable material you need.
Customize Your Braid
Once you have the general direction and scale set, you can now customize your braid to match your material. For a stainless steel metallic braid, you can set the Warp Color and Weft Color settings to a gray color using the color picker and the Warp Roughness and Weft Roughness to zero so the material has a higher sheen and appears more metallic in nature.
Create the Metal Mesh Effect
Open the Edit Weave Pattern window (next to the Weave Pattern dropdown). Adjust the Width settings so there is less space between threads and change the thread Shape from Round to Ribbon for both the Warp and Weft, then select Apply.
Add Metallic Refraction
Under the Advanced settings, increase the Warp and Weft Refractive Index until the material matches your vision for a braided cable. If you make one thread slightly less refractive than the other, you can add a little differentiation and realism to each of the thread directions. You can also adjust the Warp Specular and Weft Specular to further exaggerate the difference, again making sure one is slightly lighter in color than the other.
Try this yourself for all types of braided cables. And, to learn more about KeyShot RealCloth and UV Mapping, visit the KeyShot manual.
What Can You Create?
We would love to see what you create with this tip. Visit the KeyShot Amazing Shots forum to see what others are creating and share your own work. And if you have a suggestion for another tip share it in the comments below.


0 Comments