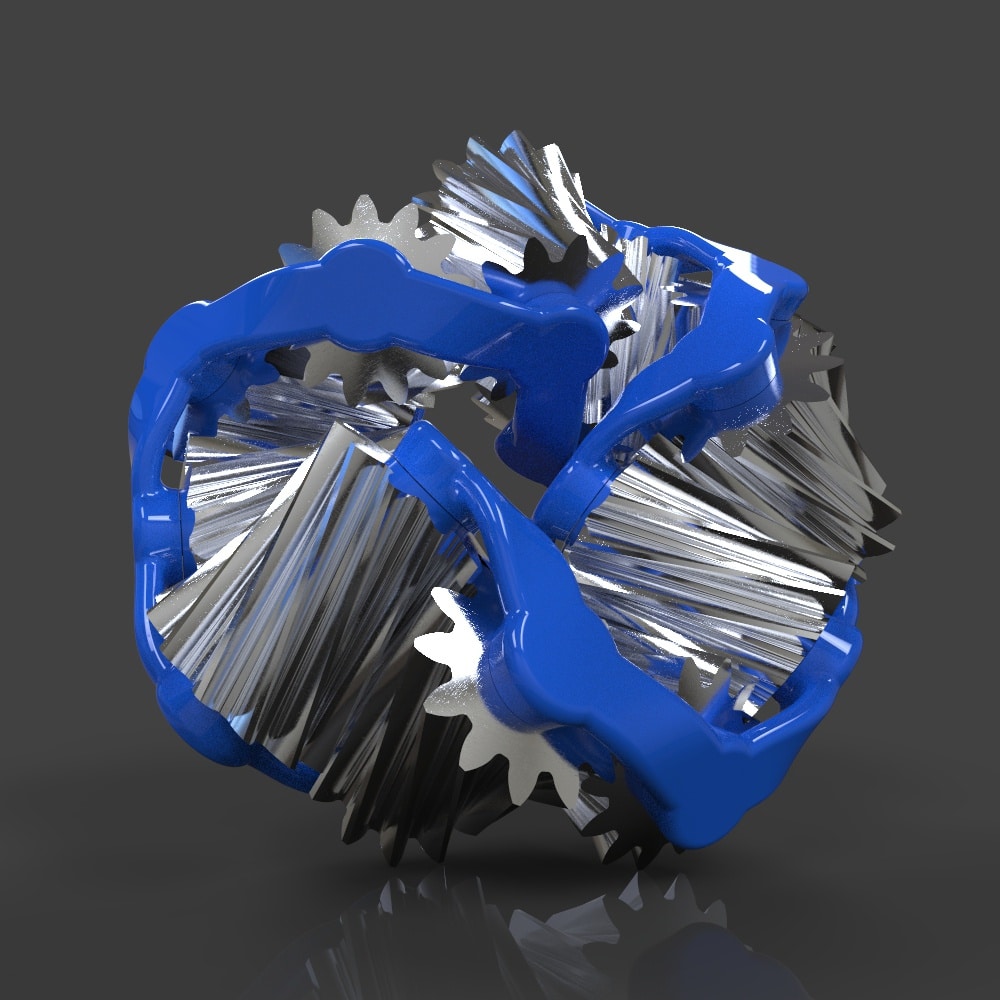
This week we take a look at the unimaginable intricacy of an 11 Gear Mobius strip and slap a wee dose of animated KeyShot simplicity on the object. In fact, our very own render rocker Thomas Teger set this animation up himself with just a few steps, 10 minutes and two swigs of Dr. Henrik Wann Jensen’s global illumination juice. Down below we’ll take you through the steps to create the same animation and throw in the KeyShot package (.ksp) file to have a go at it yourself.
KeyShot Animation: 11 Gear Mobius Strip
This KeyShot animation is created from Blake Courter’s 11 Gear Mobius Strip model downloaded from GrabCAD. It’s a quick rotation with all the gears turning in unison – 2min per frame for 200 frames on a new 32core BETA-system from Intel. Have a look.
Download the KeyShot Package!
This KeyShot package (.ksp) has all the assets and animation embedded. Just download and unzip, then open the file inside KeyShot to unpack!
![]() Mobius-Gear.zip
Mobius-Gear.zip
The steps to produce the animation shown above goes like this:
- Download Mobius Gear model
- Import the native SolidWorks format into KeyShot
- Apply blue gloss paint from the material library to the frame
- Apply scratched aluminum from the material library to the gears
- Adjust the aluminum material: reduced roughness, reduced scale and height of bump texture
- Change the lighting to the office environment
- Add rotation animation to one gear and change to 720 degrees
- Copy and paste this animation as a “linked animation” to every other gear
- Copy and paste this animation to the neighboring gear, and adjust rotation direction to -720
- Set up the camera start point desired under the camera tab and saved the camera
- Open the scene tab, and selected the camera saved in the last step as the active camera
- Add an orbit animation – 360 degrees
- Add an inclination animation with its highest point half way through the orbit animation.
- Adjust the inclination angle until desired look is acheived
- Copy and paste the animation and invert it by making the angle negative.
- Move the copied animation to start where the previous animation stops
- Add a subtle zoom animation with maximum zoom value half way through the orbit animation
- Copy and paste the animation and inverted it by making the zoom value negative
- Put the part animations and camera animations into separate folders and adjust in timeline for desired look and feel
- Create a couple single image test renderings using maximum time to determine desired quality
- Once determined, set the time per frame and let the animation rip



0 Comments