
")
1. Creating the Dieline
The dieline is the essence of structural packaging design. After initial concepts, we use Esko ArtiosCAD to construct and refine the dielines continuously until production.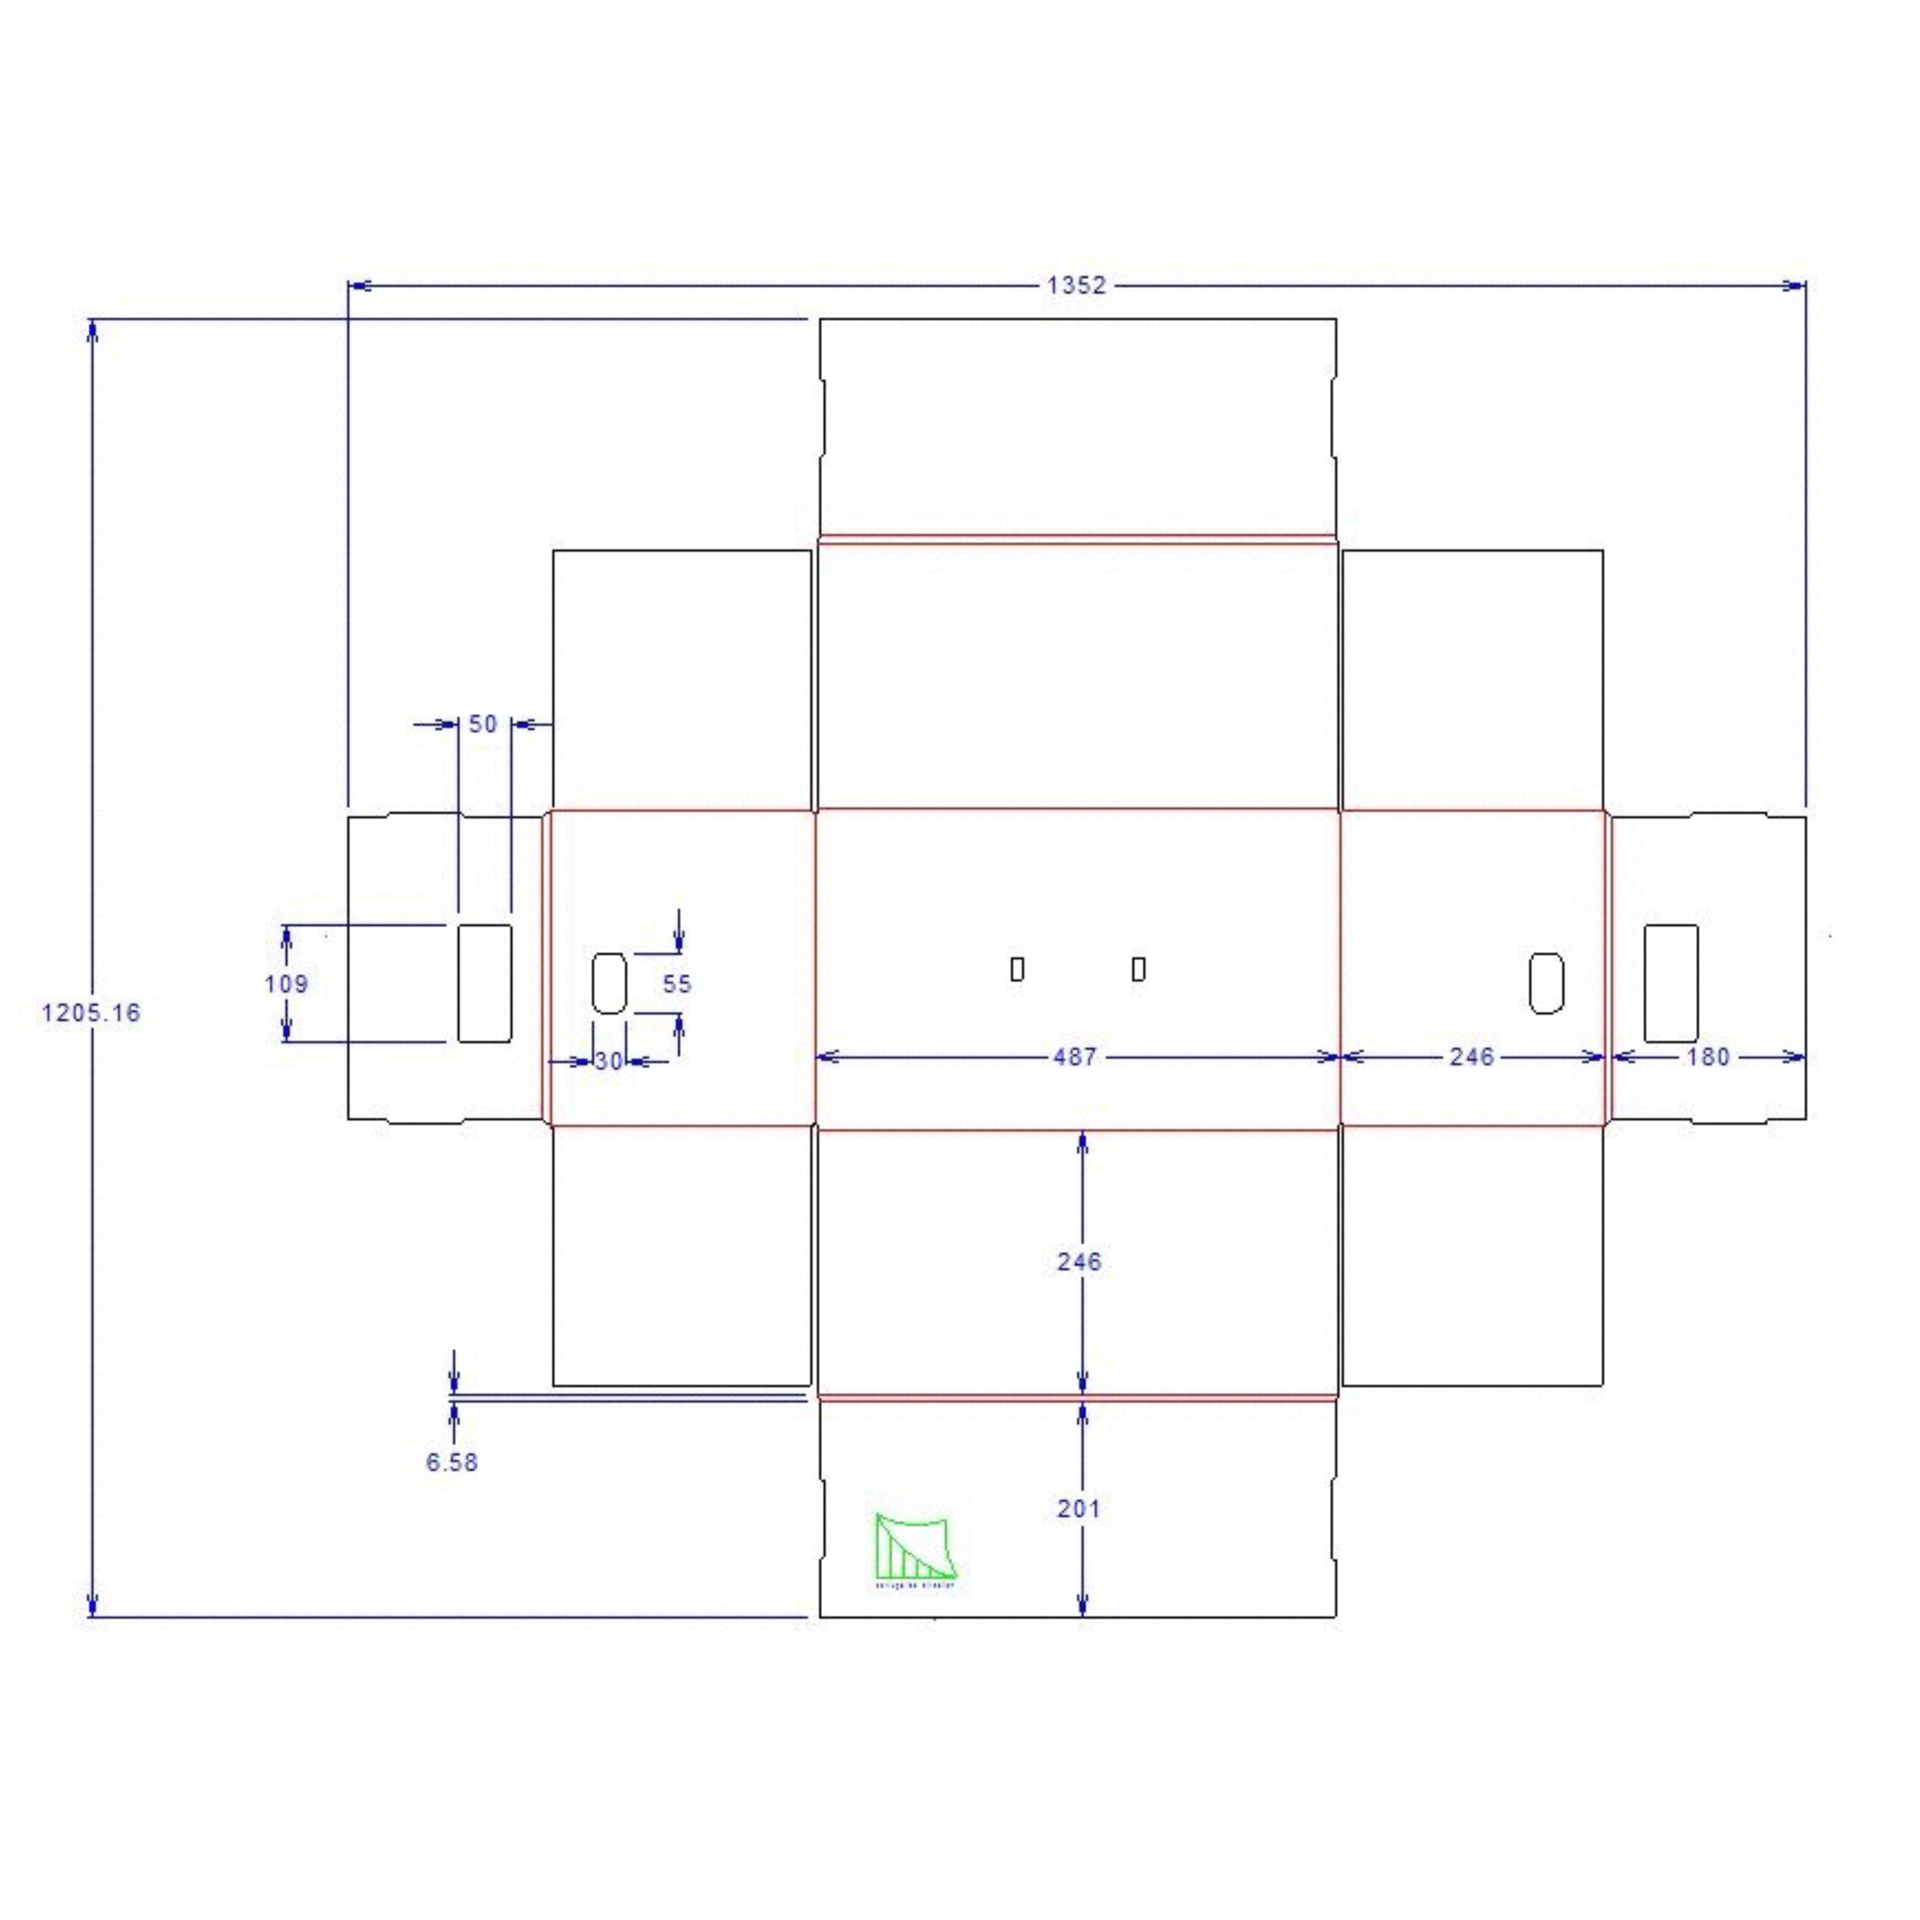
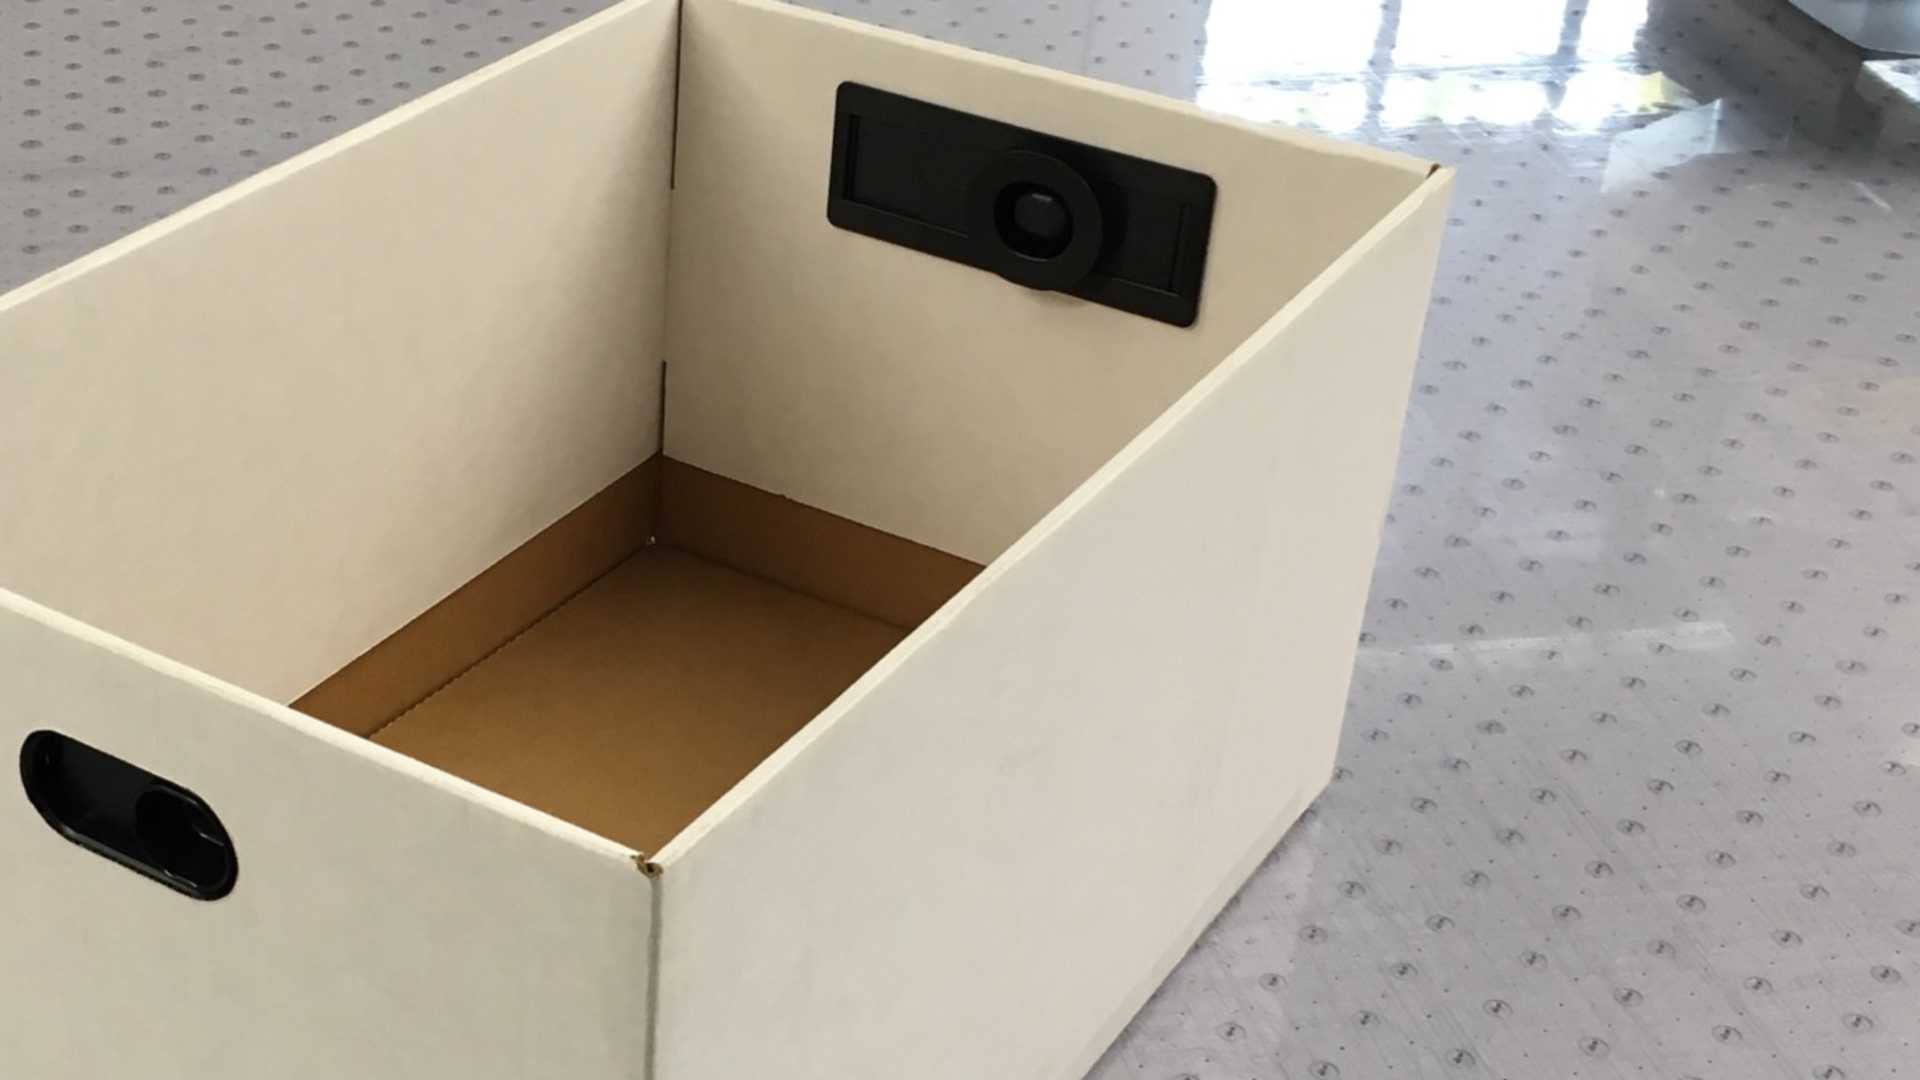
2. Traditional Approach: Physical Prototype
Traditionally, after each design iteration, we would export the dieline directly to the cutter to produce physical prototypes. This would help use visualize how the structures form in 3D.

3. Traditional Approach: The Limitations
With the traditional approach, we were limited to blank structural samples due to difficulties in producing large-size print-mounted samples in-house without any distortion.
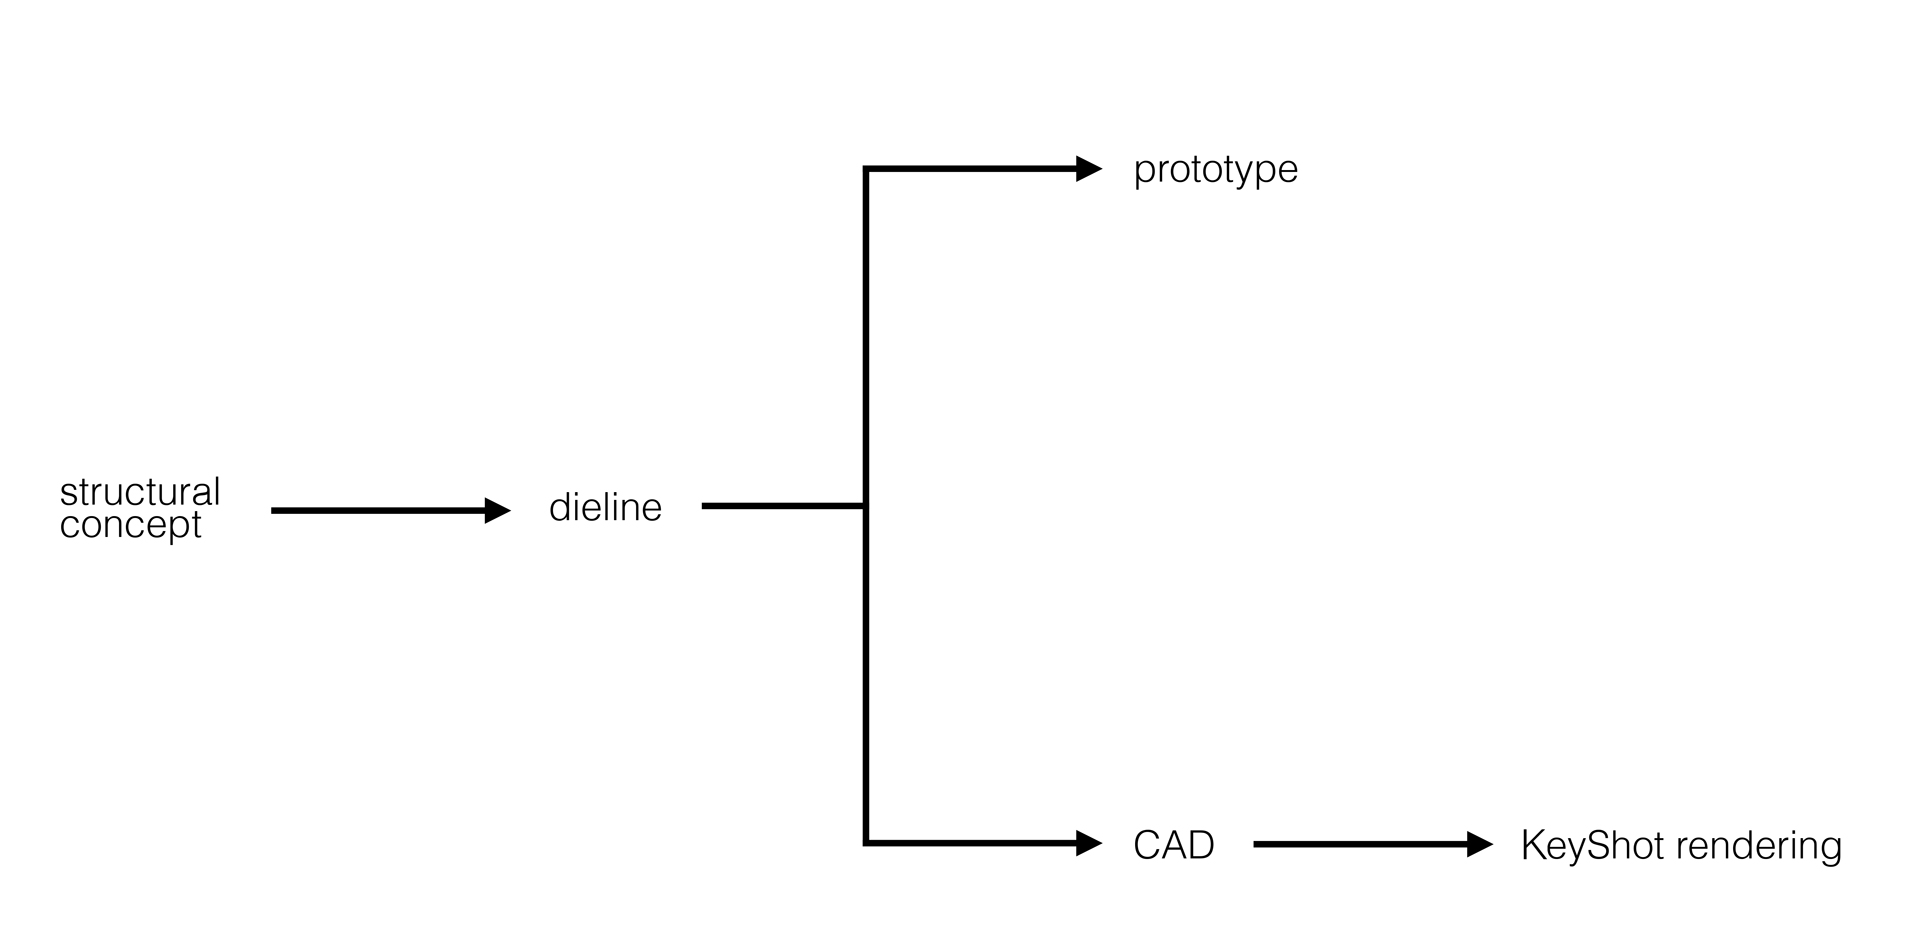
4. Digital Approach: Concept to KeyShot
Recently, we have discovered a new way to communicate our structural concepts. By going from our structural concept to dielines created in ArtiosCAD and then to KeyShot, we can use KeyShot’s powerful rendering capability to create digital prototypes throughout our packaging design process.
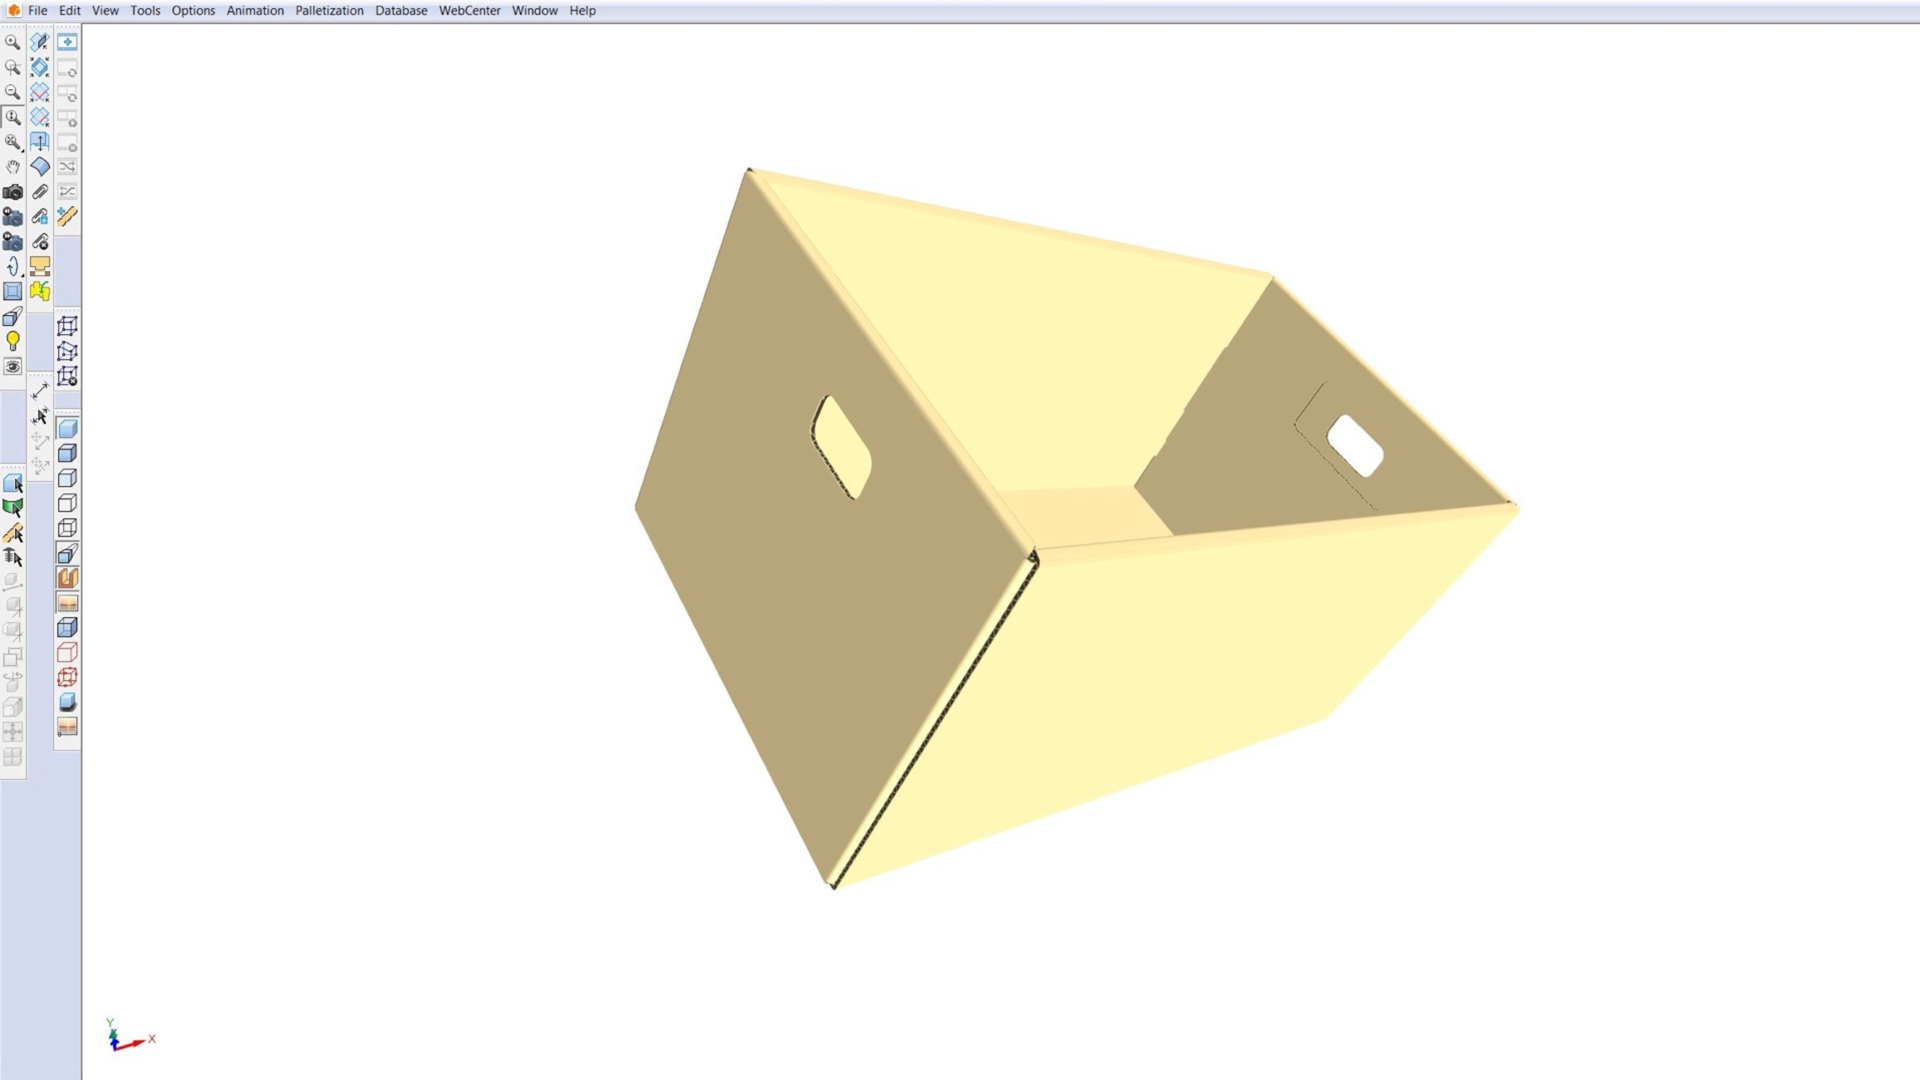
5. Creating the 3D Model with ArtiosCAD
Using Esko ArtiosCAD, we are able to use a method to add a thickness to a dieline design and materials to produce a 3D model.
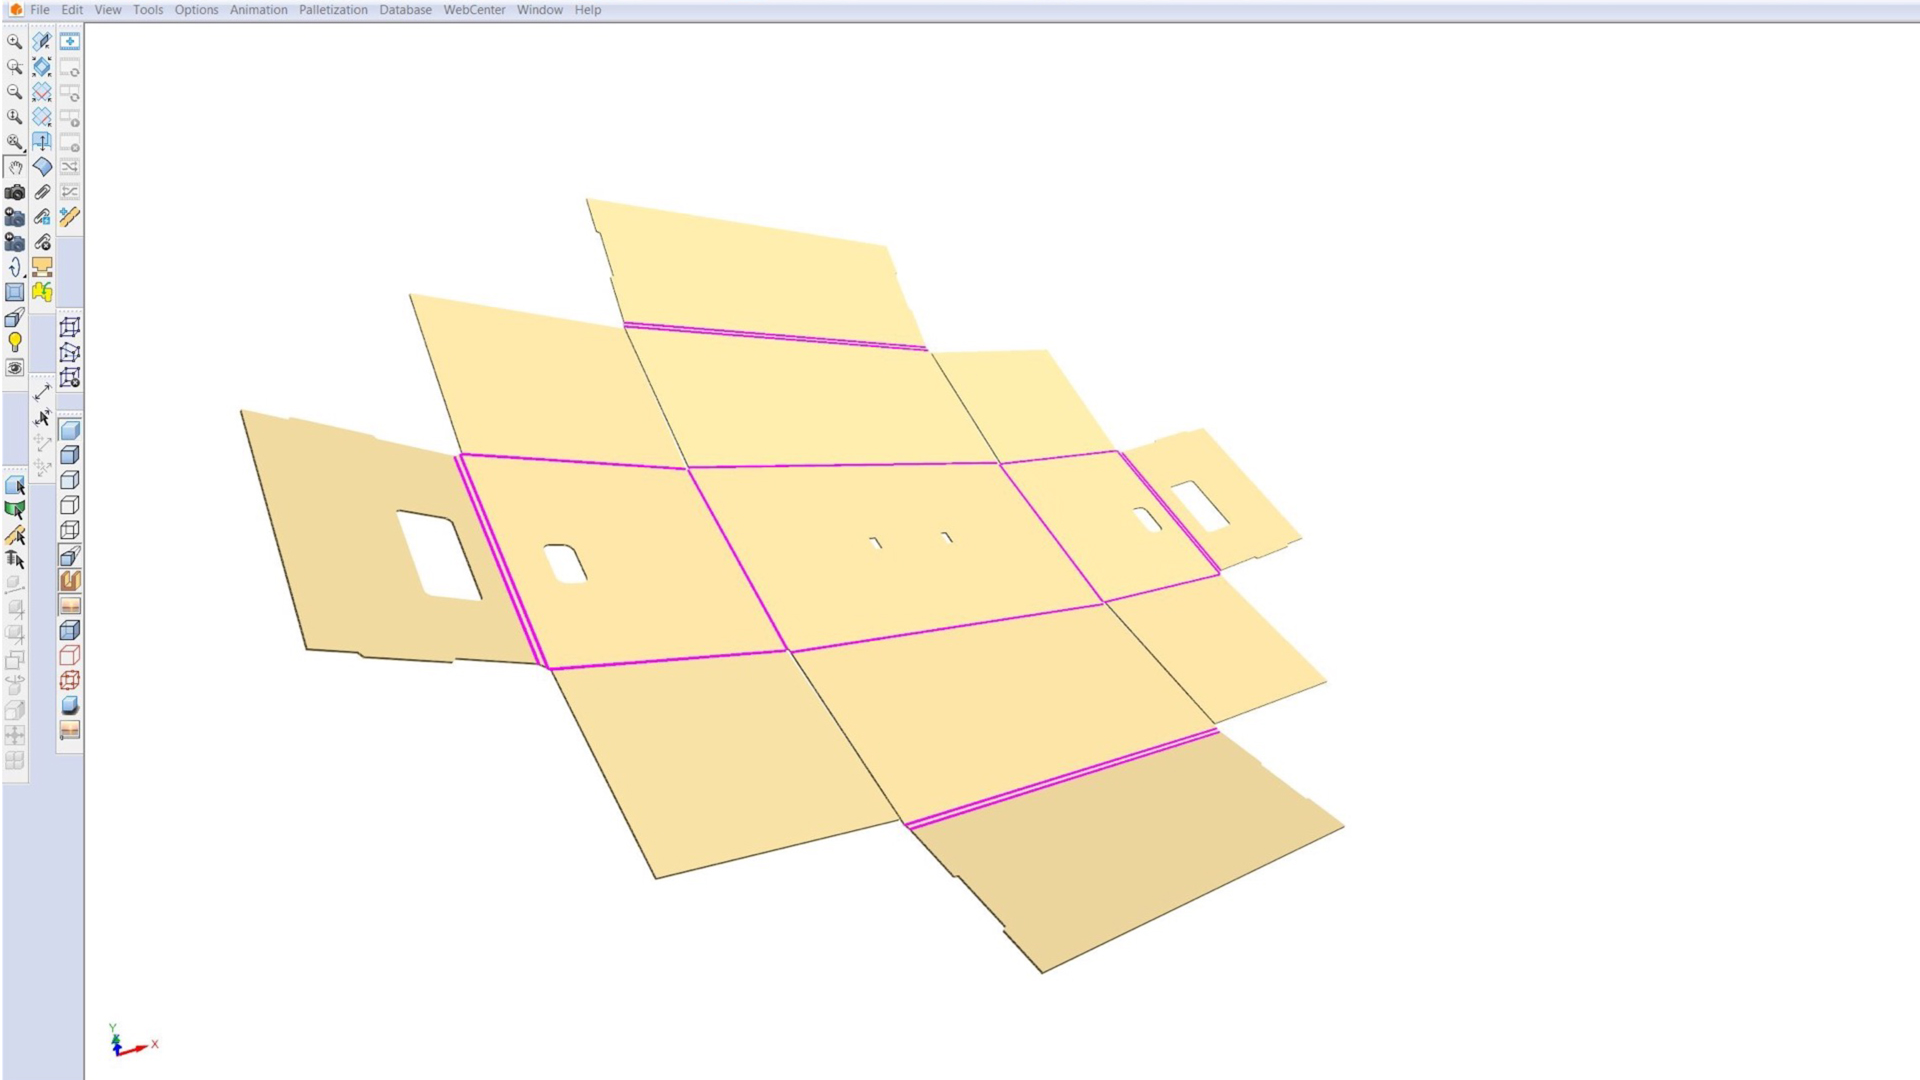
6. Folding the Model in ArtiosCAD
We can then control the fold angles for each crease line to form the box in virtual space. At this point, we’re basically at the limit of the traditional approach for a physical prototype.
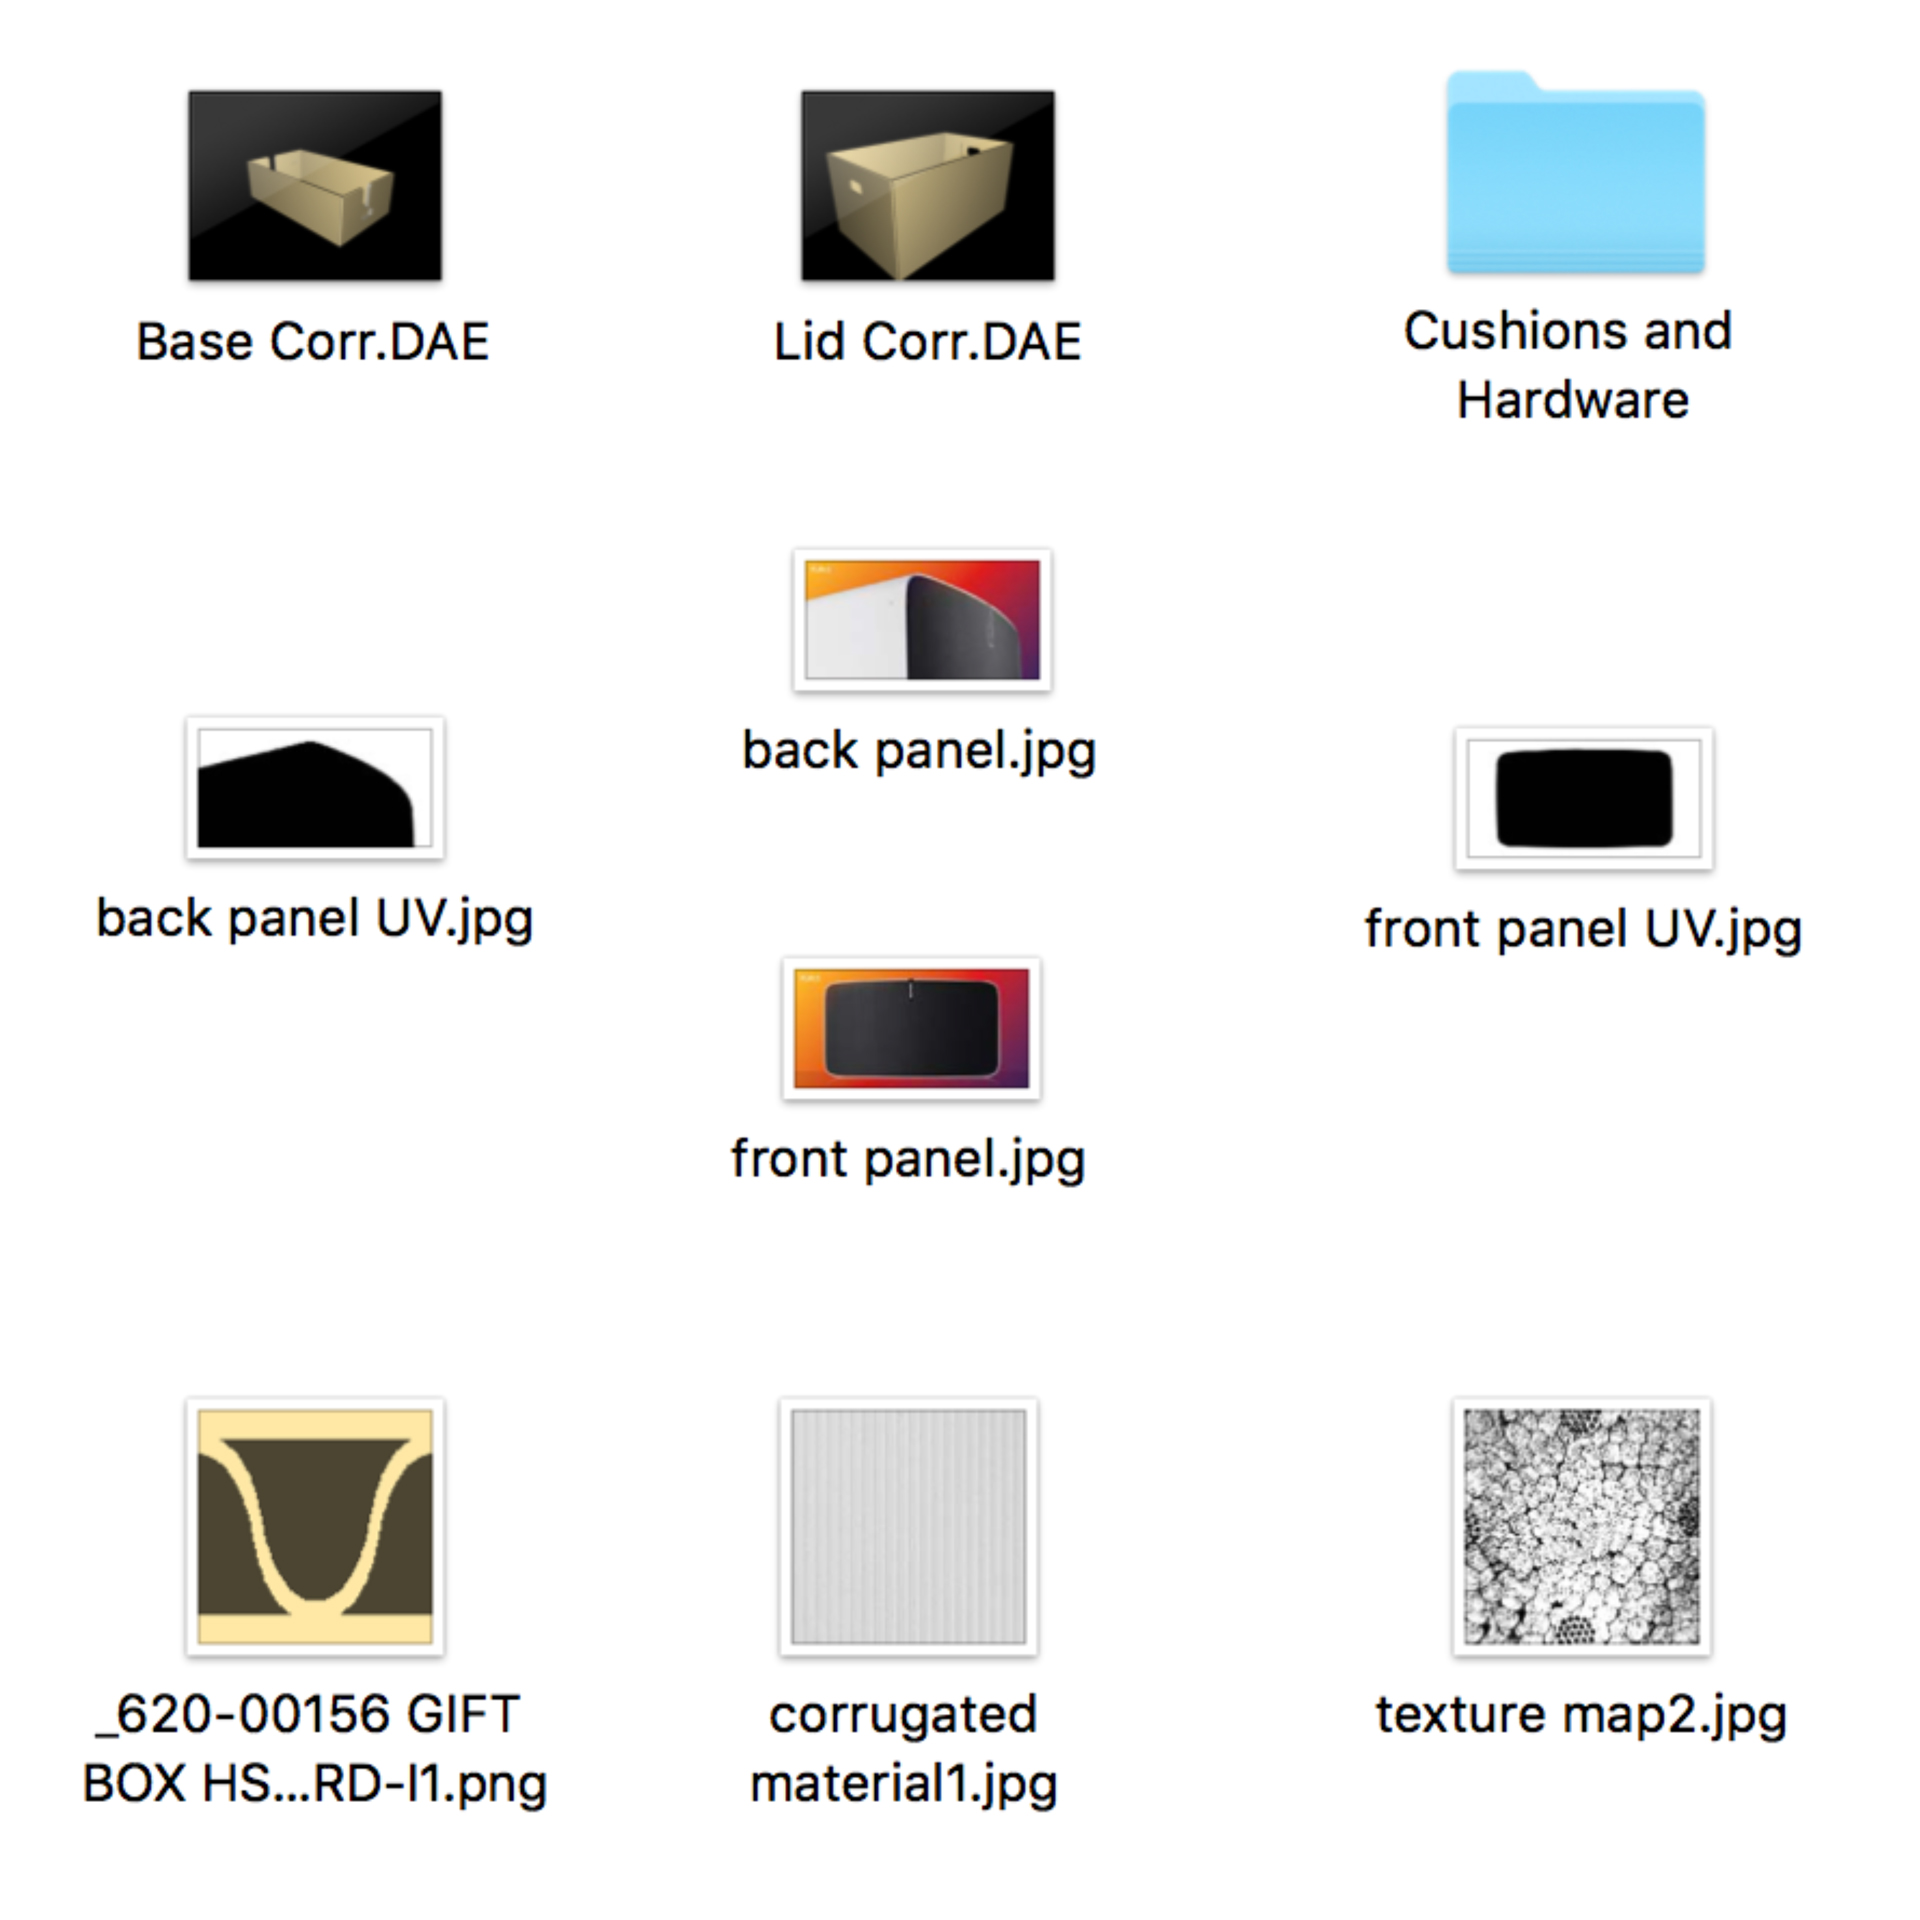
7. Exporting the Assets
The blank box can be exported to .DAE format with the edge textures produced automatically based on the paper stock we select. Cushions, hardware, and graphical artwork is created elsewhere. Next, everything is brought into KeyShot.
8. Setup in KeyShot
The material and label capabilities in KeyShot are great for us to simulate printed effects such as UV coating, foil stamp, embossing, and more. Likewise, the KeyShot Library makes it easy to drag and drop our custom materials onto the different parts.
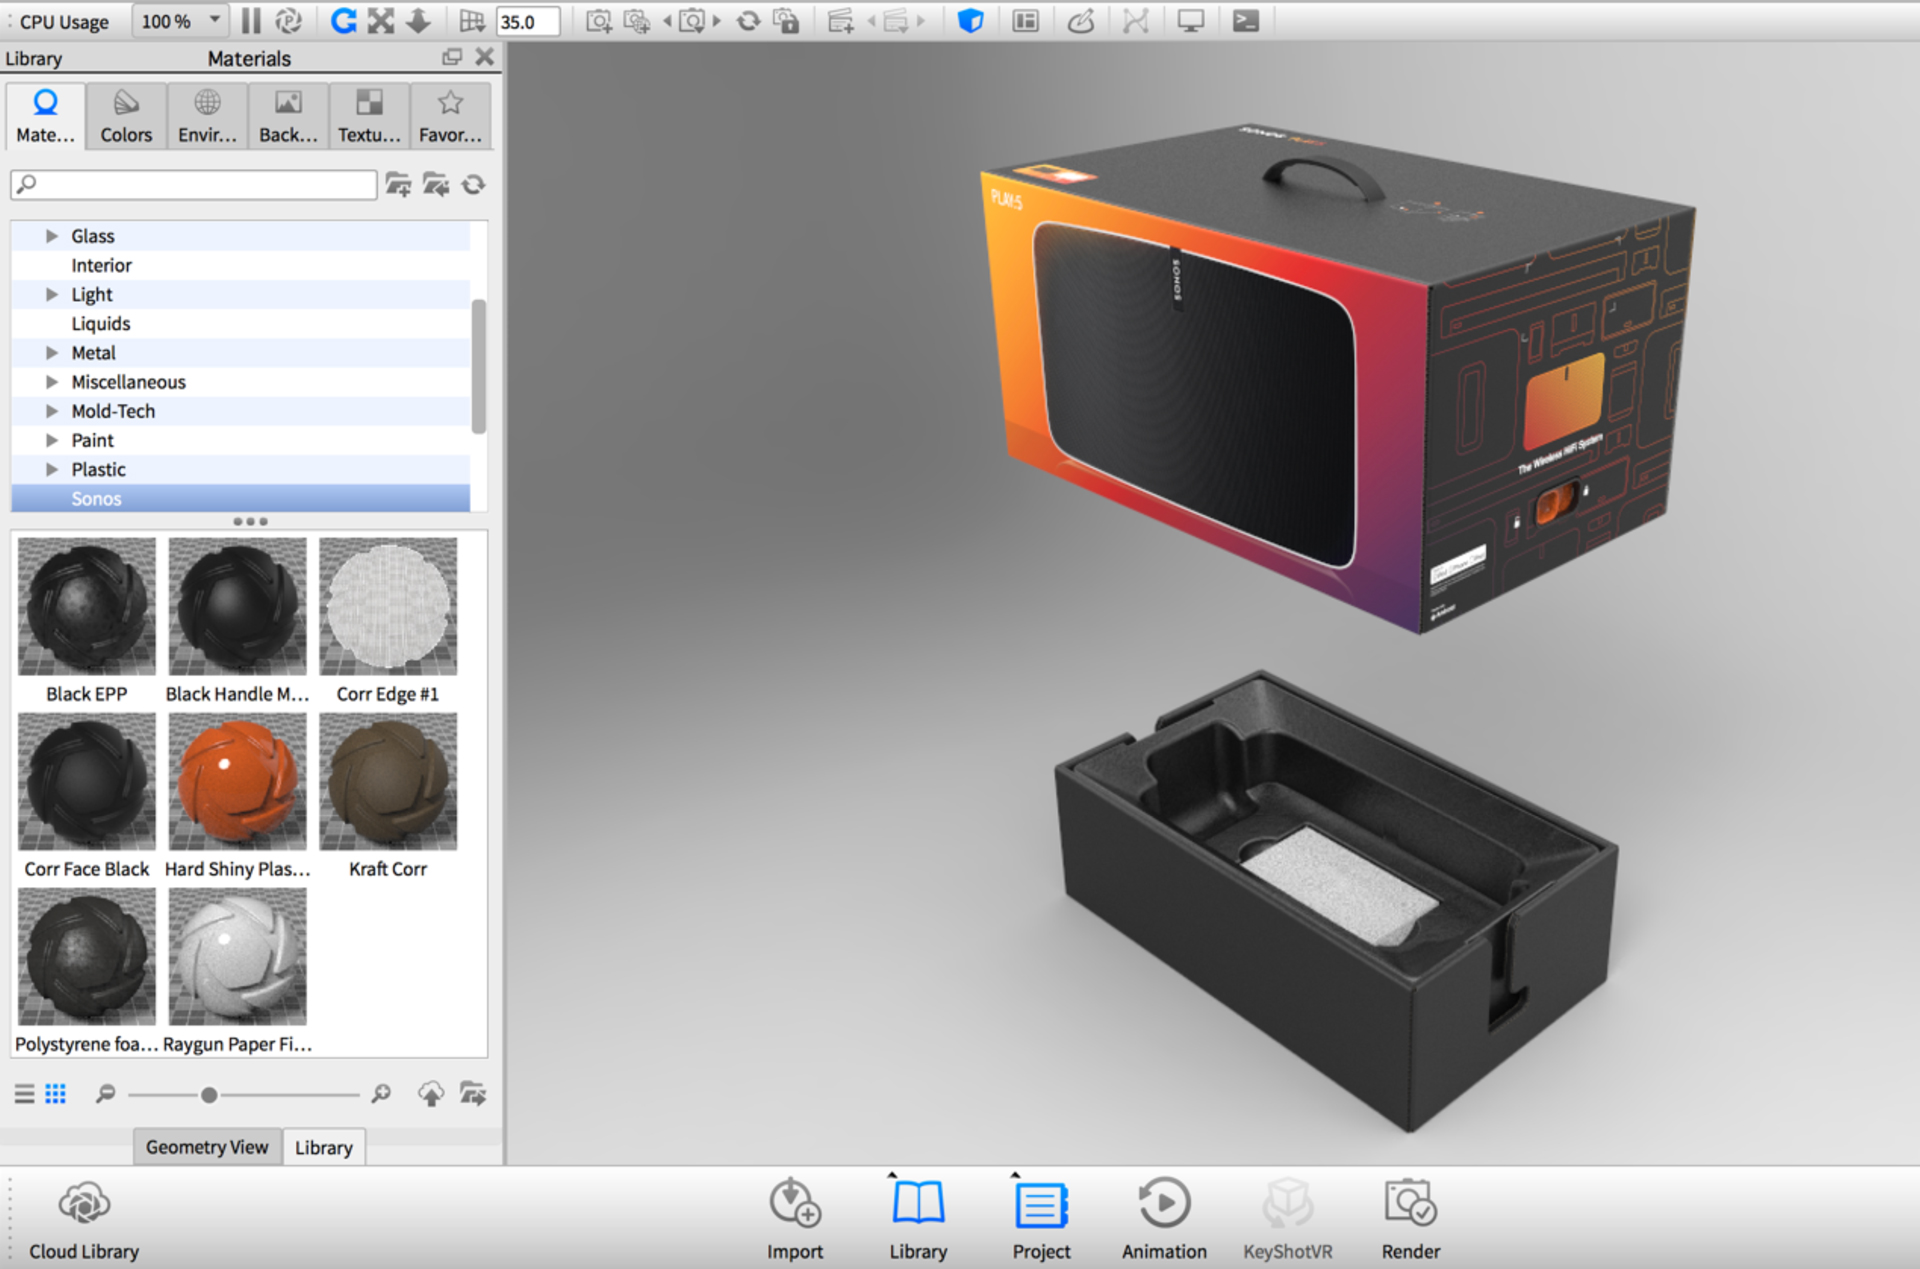
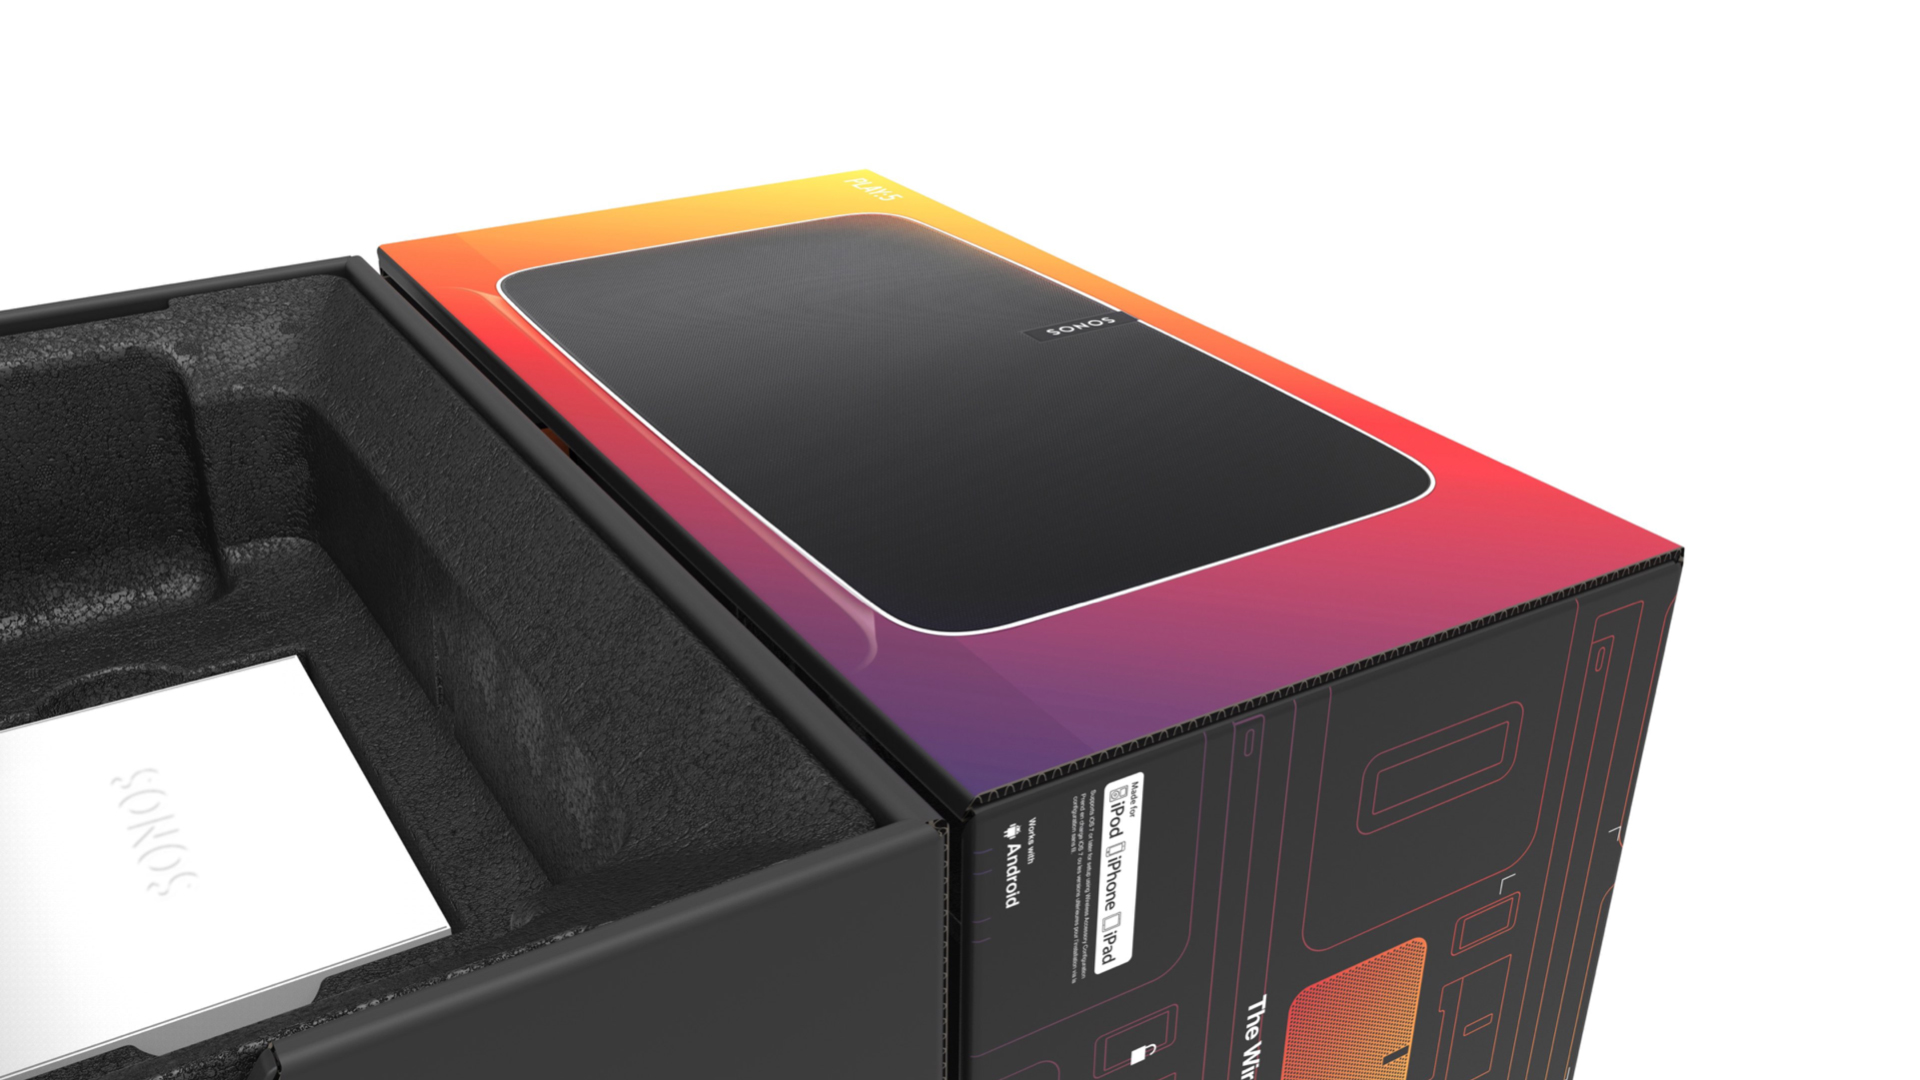
9. Creating the Final Shot in KeyShot
The folded parts and the exposed corrugated edges, along with the printed details give the box a realistic touch that resembles the appearance of a production sample. With everything setup, we can evaluate different variations and produce final shots.
There’s so much more to what Sonos does in the creation of their products. Sonos also uses KeyShot in the creation of their product visuals, using it both to evaluate design iterations as well as create the press materials for product launches.
“KeyShot gives us the flexibility to use rendered content in our production files for packaging artwork and allows us to focus our time and resources where it matters most–developing a customer experience we are proud of.”
Customer Spotlight: Sonos
Learn more about how Sonos uses KeyShot in their product design process.


