Create Wire Mesh with KeyShot RealCloth
KeyShot comes with an array of RealCloth material presets to apply directly to your model for fast, realistic fabric visuals. With KeyShot Pro you have the ability edit a weave pattern to create your own custom woven materials. KeyShot 10 adds 3D ply which uses 3D curves to generate woven patterns for the most realistic result possible.
The Mesh Material shown in the video is available for download on KeyShot Cloud.
1. Prep Your Model
To create realistic wire mesh geometry in KeyShot, we’ll start with a UV mapped surface, the same you would for any other RealCloth application. Generate your UV’s either in your modeling software of choice or by using KeyShot’s UV-Unwrap Tool (KeyShot 9 and above).
2. Apply a RealCloth Preset
Once your model is prepped, the fastest way to get started creating mesh-like materials is to apply a RealCloth material preset to your model from the Library, Materials tab. Select a material that shares a weave pattern similar in appearance to what you need for the final result.
Here, we’ll start with a Plain Weave Mesh material to create a basic mesh pattern. However, you can create different types of mesh patterns by selecting a RealCloth material preset with a different weave or creating your own custom pattern in KeyShot Pro (select Project, Material tab, Edit under Weave Pattern).
3. Enable 3D Ply Geometry
Next, select 3D Ply Geometry under the Geometry, Display options. Once enabled, your geometry should update automatically. If it does not, click the Execute Geometry Node button located at the bottom of the Material Properties (or in the top right corner of the Real-time View).
4. Customize Your Wire Mesh (KeyShot Pro)
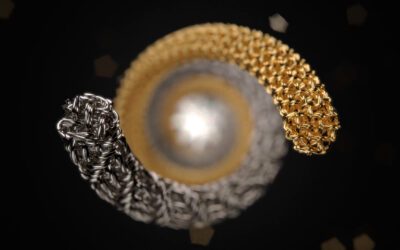
With KeyShot Pro you can further customize your wire mesh. Open the Material Graph and select the RealCloth node. Change the RealCloth connector from the Surface input to the Geometry input of the parent material. Notice that your model adopts the weave pattern.
Now, choose a material you would like for your wire mesh. We’ll select Metal, drag and drop it into the Material Graph, then connect it to the Surface input of the parent material. Your geometry should once again update resulting in a mesh weave made of your newly applied material. Make any additional tweaks to your RealCloth and material settings to dial in the material appearance you need.
This is a great way to make everything from a wire mesh to wicker weave and more to quickly and easily increase the realism of your 3D renderings. You can learn more about RealCloth features in the KeyShot Manual.
What Can You Create?
We would love to see what you create with this tip. Visit the KeyShot Amazing Shots forum to see what others are creating and share your own work. And if you have a suggestion for another tip share it in the comments below.


0 Comments