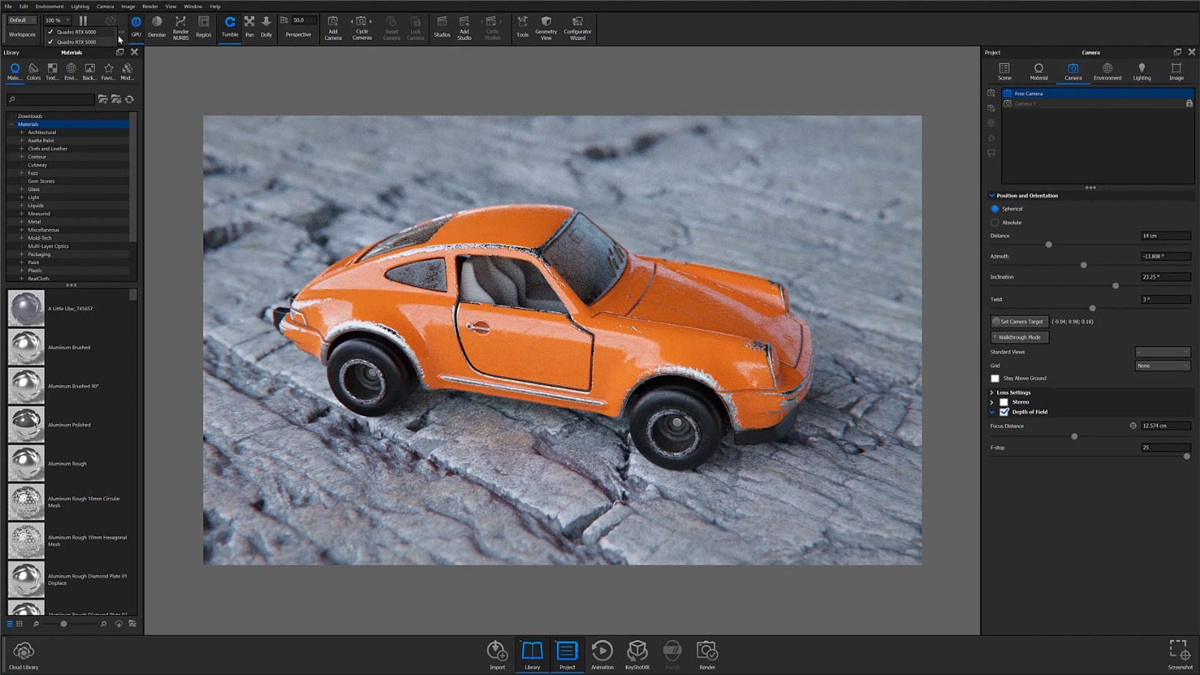
GPU rendering in KeyShot is a feature available for both real-time rendering and local render output. It allows one-click GPU render mode to take advantage of multi-GPU performance scaling and the dedicated ray tracing acceleration hardware in NVIDIA RTX-capable GPUs. You can toggle between GPU and CPU as needed or even use one to render in the background while working with the other. It’s a workflow that unlocks huge performance improvements and brings more flexibility to scene setup, your real-time workflow, and rendering output.
Using GPU Rendering Mode in KeyShot
In KeyShot 9, you now have the choice to render using either the CPU or the GPU. You can activate GPU mode if you have an NVIDIA GPU built on Maxwell microarchitecture or later (with CUDA Compute Capability 5.0 support). If your GPU is supported, you’ll see the GPU button on the KeyShot Ribbon and in the Render menu, which allows you to toggle between CPU and GPU rendering. These items will be grayed out if your NVIDIA driver is not up to date.
To activate GPU mode for the Real-time View, select GPU on the Ribbon.
When GPU mode is active the CPU Usage drop-down in the Ribbon is replaced with a GPU Usage drop-down, listing the available GPUs. In the image below, you see a Quadro RTX 5000 and Quadro RTX 6000.

Both of these cards render different aspects of the image depending on their speed but when you select View, Heads Up Display (Ctrl-H), with multiple graphics cards your max memory will be limited by the graphics card with the lowest memory. You can allocate which GPU to use within the usage drop down to make use of the GPU memory desired.
Coming Soon! With KeyShot 9.2, you will be able to us NVIDIA’s NVLink capability to interconnect multiples of the same GPU together and extend the RAM. For example, two NVIDIA Quadro RTX 8000 GPUs will provide a combined 96 GB of GPU memory.
If the GPU runs out of memory, KeyShot will revert to CPU rendering.
Final Render with KeyShot GPU Rendering
You have GPU rendering options for final output render options as well. If your GPU meets the requirements, you have the ability to render in GPU mode locally with Default and Background render modes or on networked GPUs with Send to Network. In the Render dialog (Ctrl/Cmd-P), under Options, select the Render Engine dropdown and choose Inherit from Real-time View to use your real-time GPU usage or either CPU Mode or GPU Mode to specify your own CPU or GPU usage.
When Default, GPU Mode is selected, the GPU Usage dropdown can be used to select which graphics cards to use for rendering. If multiple cards are selected, KeyShot will split the job between them to provide faster results.
Even if your own computer’s GPU does not meet requirements, you can still us GPUs on your network that are set up for Network Rendering. Just select, Send to Network and choose GPU Mode from the Render Engine dropdown.
Do KeyShot GPU Results Match CPU Results?
It’s also important to know that visual and feature parity are matched between CPU and GPU mode aside from a few limitations, including the Cutaway material, Rounded Edges and NURBS geometry. These limitations will trigger a warning icon in the Real-time View. Click the icon for more information about what part of your scene is impacted.
KeyShot GPU Rendering Resources
Try GPU Rendering in KeyShot
Interested in trying KeyShot? Download and start rendering today.


0 Comments