Labels. While I’m known in some parts of the office as the guy who can stick impressive amounts of labels on the face without suffocating, there are more important objects to consider when applying the sticky back graphics. Those objects are your 3D models. Labels are crucial to making your packaging look fantastic–your cosmetics, soft good or bottle rendering take on the appearance of the physical item yet to exist except through your artistic eye. KeyShot has plenty of label-laying options to perfectly position that image. Here we touch on a few tips to help you get a more authentic look and understand how the positioning of labels works.
Applying labels in KeyShot
If you apply a label in KeyShot and it comes in stretched, skewed or looking odd, it’s not your model, the amount of day-old coffee you’ve had or your image. Labels come in applied with a default projection, but fortunately, there are plenty of options to help you get exactly the look you’re going for. Let’s use the example of applying a beer label to a beer bottle.
Adjust your label
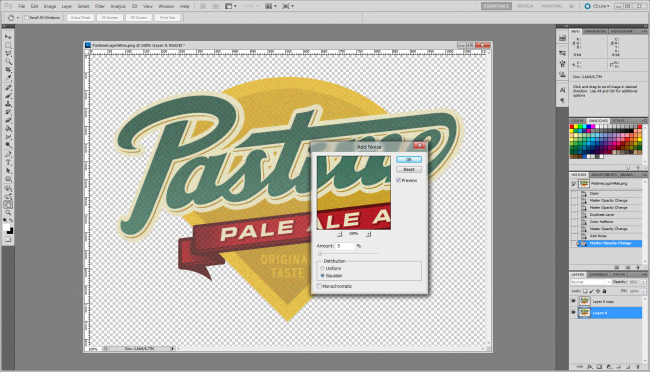
Before we get into KeyShot, here’s a quick tip I highly recommend for labels. Depending on the type of label and what it’s applied to, there are a few effects you can add using Photoshop to get the image looking more authentic prior to import. In Photoshop, create an additional layer of the label graphic. Select Filter, Pixilate, Color Halftone… and set a small Max Radius. Then drop the opacity of that layer down to 5-10%. For the main layer, select Filter, Noise, Add Noise… and add 5% Gaussian. Lower the layer opacity to about 95% (more or less depending on your application.) This helps the label blend better with the environment, look more realistic and not stand out so sharp. It’s also easy to set up a quick action for this in Photoshop. Later, you can adjust the Intensity and Depth of the label in KeyShot, but creating a good label graphic beforehand gives you a better look right from the start.
Change the mapping type
By default the label comes in with a Normal Projection. Depending on what your object is, you’ll want to change this. For a cylindrical object like our bottle, change this to Cylindrical in the Mapping Type pulldown.
Change the Scale
You may not have known it, but there are additional scale setting in the Mapping options. Select the tick mark next to Scale. This option will change to give you X and Y scale sliders. While the main Scale slider changes the overall scale or size of the label, this allows you to change the X and Y scale independent of each other.
Change the label position
Now, there’s another way to adjust the label. The large Mapping Tool button staring at you ominously from above the mapping properties allows you to translate, rotate, and scale the label on the screen. You have control over moving along the X, Y, and Z axis as well as the ability to rotate arround each and scale each independent of the other.
Hopefully this has helped show how simple applying a label is using KeyShot. To see it in action, visit our Tutorials section and watch the Labels video. This goes into all the different settings and what each one does. Interested in trying KeyShot? You can download it and start creating photorealistic images TODAY. Grab the latest version of KeyShot here.


