There are some great examples of KeyShot caustics users have sent in since we introduced it with KeyShot 4.1. In a recent forum post, Dries Vervoort filled us in on how he created an Aquarium Box scene with a single point light producing spectacularly sharp focused caustics. He presented a few screenshots from the KeyShot Realtime rendering preview to get our mouths drooling and threw in a render using glass elipsoids as well. He provided a description of how he set up the scene, which is nice, but opening the scene, working with the lighting and material, tweaking and seeing the effects yourself is even more fun. Dries has shared the KeyShot .ksp file and we’ve shared the download below.
How do focused caustics work in KeyShot?
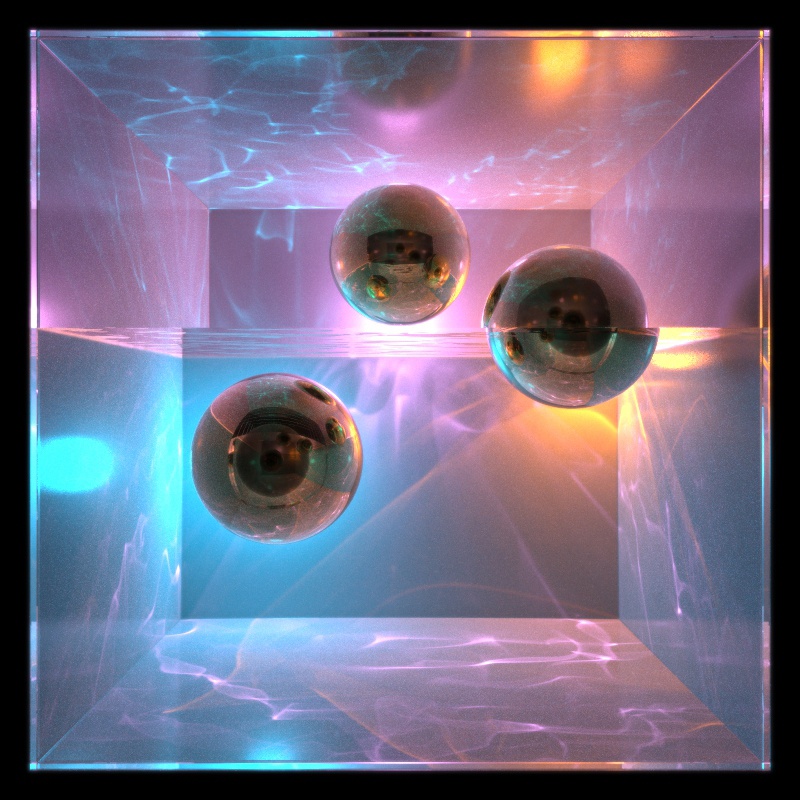
It couldn’t be more simple. From the Project, Settings tab, simply enable “Focused Caustics” from the Quality options. While caustics will work with HDRI lights, you will get the best and strongest results by setting a physical light source such as an area, point or IES light as Dries has done in this example. The addition of a Ground Plane (Edit, Add Ground Plane) or other geometry (like the water and the walls in this scene) provide additional detail to the caustics effect. With the box checked you will see the caustics calculated immediately in real-time.
Dries noted some additional settings he adjusted to get the sharp relfections you see. As he comments about this scene…
“I increased the IOR on the inner faces of the box and decreased roughness a great deal. Now you get sharp reflections of the water caustics in the spheres, blurry reflections of caustics in the walls and slightly colored caustics due to being reflected from metal. This is a realtime render. For ultimate caustics quality, the realtime renderer is unbeatable.”
Thanks again to Dries for providing such a simple, interesting and fun example to try out focused caustics in KeyShot. Snag the download below and share yours in the comments or on the KeyShot forums!