")
You can use the KeyShot Material Graph to create layered materials. One common material request is to create a glitter finishes on transparent materials like glass or clear plastic. Here’s how to do it.
How to Create Glitter on Glass
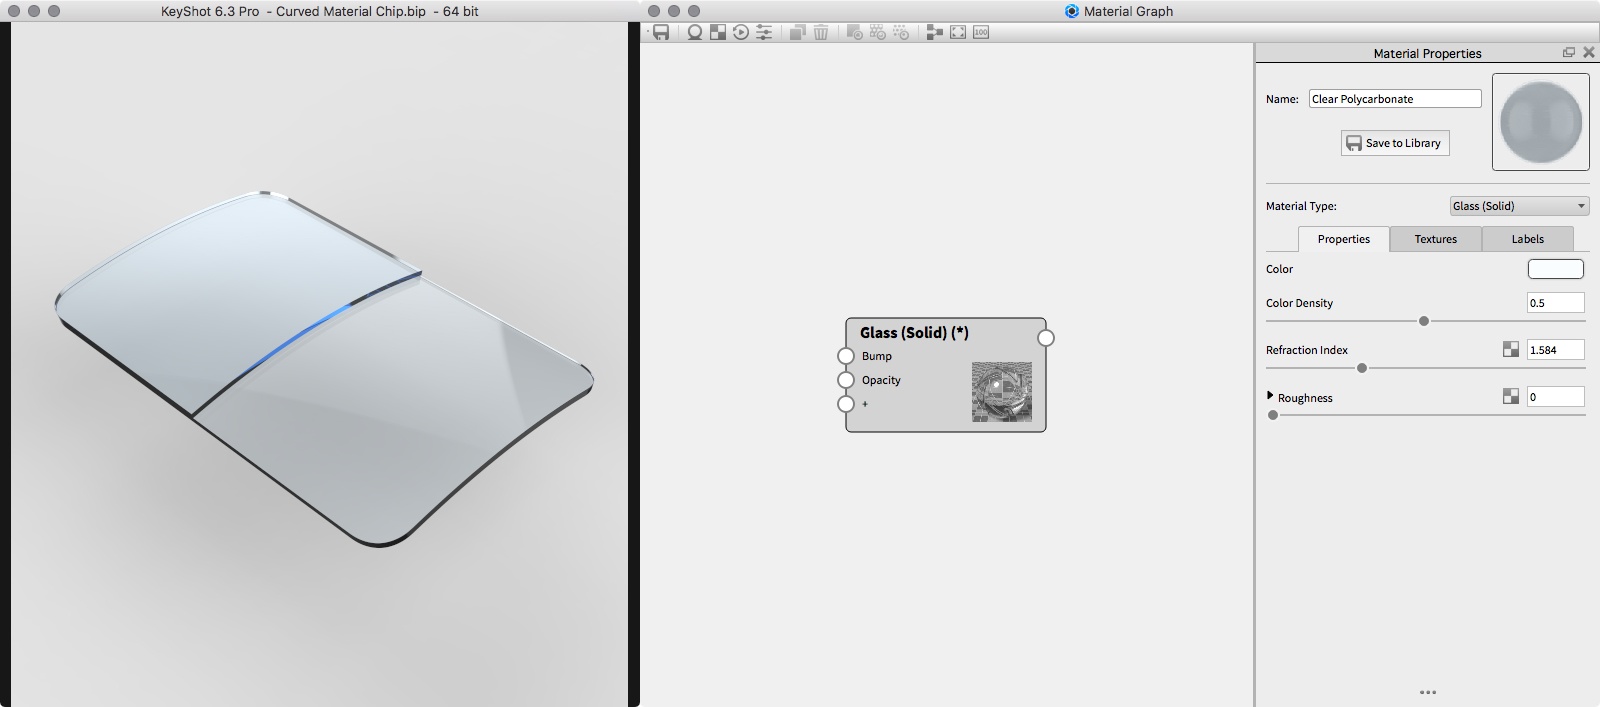
To create Glitter on Glass, start with a material like Glass (Solid), Dielectric, or Plastic (Transparent) to represent the clear substrate material. In the screenshot below a Solid Glass material is applied to the part and material properties adjusted to represent a clear plastic with a slight color tint.
In order to add a layer of metal to your material, open the Material Graph, right-click in the workspace, then select Material > Metal. Drag a connector from the metal’s output node (on the right) and apply it to the Glass (Solid) material as a label by dropping it on + node.
By applying a material as a label, instead of an image, the visibility of the label isn’t limited, so the metal wraps around your entire object as a second layer of material on top of the glass. This is also why you will see a label suddenly appear as a solid material if the label’s color texture is removed. Also, as a rule, you can add opaque layers to transparent materials but not the other way around.
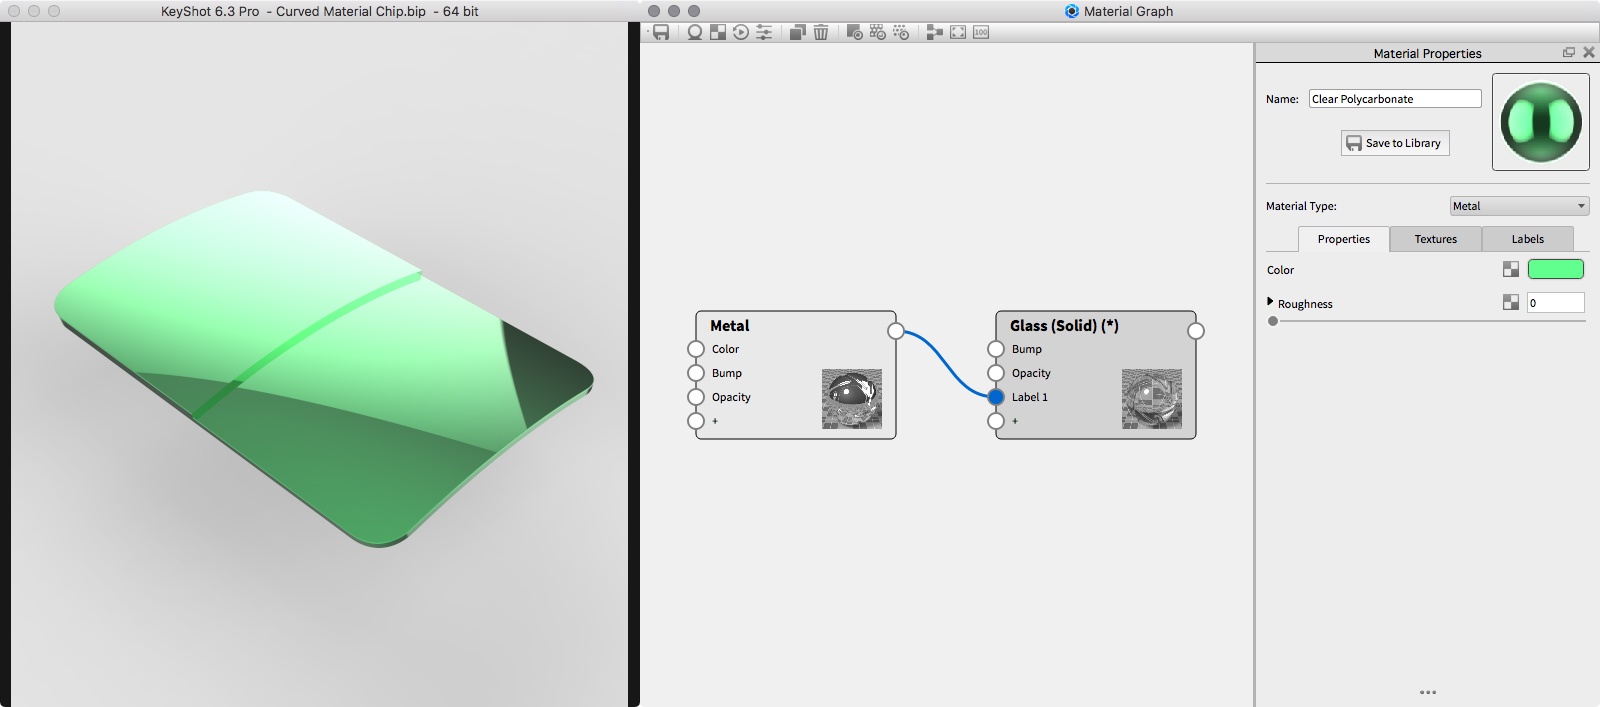
The metal is going to act as our glitter layer. To create this appearance simply modify the metal’s material properties and textures for the look and color you need. Let’s do this by continuing our work in the Material Graph.
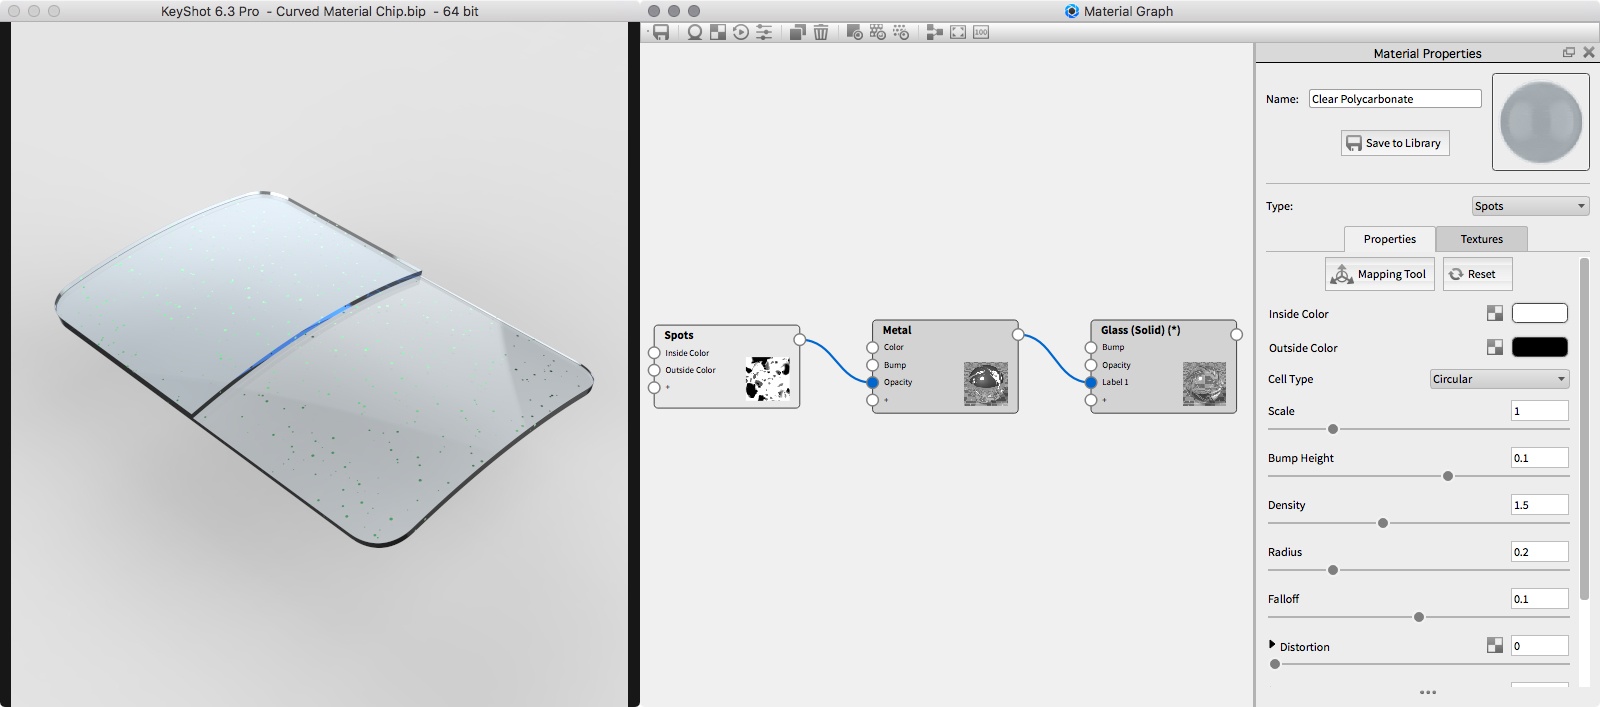
Add Opacity Map to Control Visibility
Adding an opacity map to control the metal’s visibility allows us to recreate the flecks of metal. Right-click in the Material Graph workspace to select Textures > Spots. Drag a connector from the output node to the Metal’s Opacity node. The spot texture will act as a mask when set as an opacity map.
The default color designation of black spots on a white background gives us the opposite effect, so change the Inside Color to white and Outside Color to black. This will provide the appearance of small metal flakes, and you can adjust the shape, scale, density, or other settings to fine tune the desired look.
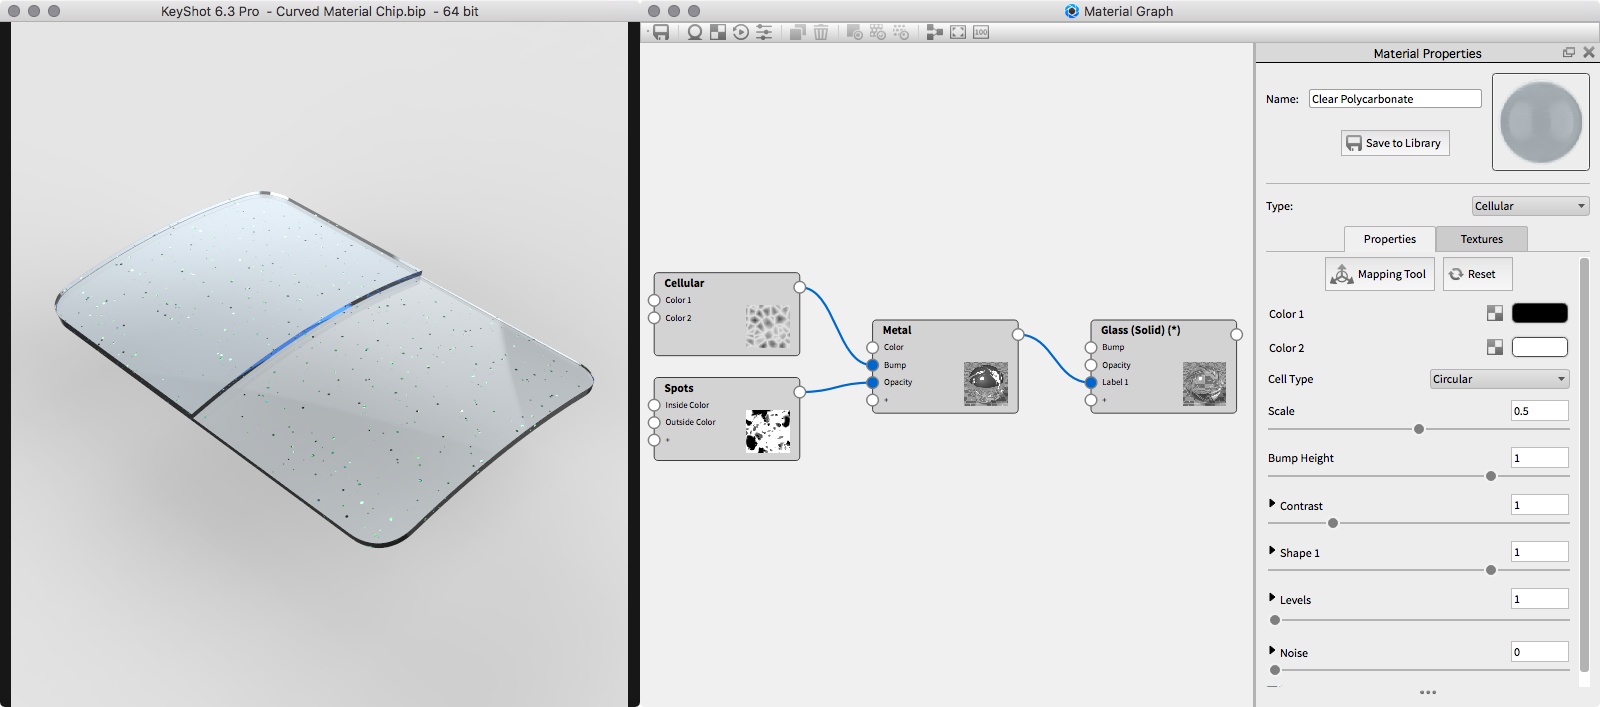
Add Extra Variation with a Bump Texture
One thing missing from your metal flakes is the random scattering of reflections;. Currently the metal follows the form of the underlying geometry. You can add a bump texture to help differentiate the glitter. Right-click in the Material Graph workspace and select Textures > Cellular. Drag a connector from the output node to the Metal’s Bump node.
Add Color Variation with A Gradient Color Map
You can also use a Color Gradient to change the color of the metal based on your view direction. This will give a subtle color variation within the metal flakes. Right-click in the Material Graph workspace and select Textures > Color Gradient. Drag a connector from the output node to the Metal’s Color node.

You could then duplicate this layer and make modifications to the size, position, bump, and color to get a more detailed material. This technique is extremely flexible, and many of the parameters can be changed to achieve different results. You can use this method to add metal flakes to a paint layer, paint spots to a cloudy plastic, or any other variation.
Download Scene
Hands-on KeyShot Training
Interested in learning more about KeyShot? Contact us for information on our training that covers everything from KeyShot Basics to Advanced Workflow, Material Creation and more.
Contact Us